FORMS AND
MEDIA CREATION
IRS 1099 REPORTING (Effective 2020): This option produces a file for upload to a third party service with Nelco.
The Forms and Media Creation option creates the following:
1099 FILE: A/P 1099 file to upload to Nelco, who then file with the IRS and print/mail forms to vendors
Report AP762: 1099
Register (A/P), report AP762.
Report AP762N: Federal 1099 PC File Server File Creation, report AP761N, lists the total gross dollars included in the file, and number of vendors in the file, and the minimum 1099 dollars used.
SkilMatch
1099 programs do not have the capability to create/print forms
1099-MISC/1099-NEC. The SkilMatch file is customized to
upload/file/create forms with our third party service, Nelco.
SkilMatch
1099 programs do not have the capability to create electronic data for the
IRS. The
SkilMatch file is customized to upload/file/create forms with our third party
service, Nelco.
The IRS requires Form
1099-NEC be used for all Non-Employee Compensation (individuals that are working as contractors
for your company verses an employee).
The IRS Form 1099-MISC has been reformatted due to the implementation
of the 1099-NEC and the NEW Form 1099-MISC will be used starting 2020.
Full details are available here: https://www.irs.gov/instructions/i1099mec
IMPORTANT, NO STATE filing for 1099-NEC: The IRS includes Form 1099-MISC in the CF/SF Combined Federal/State Filing program and provides (forwards) the information from the 1099-MISC filing to states who participate in the program. The IRS has determined that Form 1099-NEC will NOT be included in the CF/SF program. This new 1099-NEC reporting is handled differently, state by state, and many states have not yet posted and/or determined state requirements. At this time SkilMatch customers will need to contact the state to determine if any submission is needed and submit 1099-NEC information manually (using 1099 registers). SkilMatch 1099 files uploaded to Nelco do not include state filing data.
IRS 1099 REPORTING (Effective 2020): OUTSOURCE FILING/PRINT to THIRD
PARTY SERVICE, NELCO
If you
plan to use SkilMatch for 1099-MISC/1099-NEC to assist with reporting, here are
the things you need to know:
SkilMatch
is excited to partner with Nelco to ease the process of filing (electronically
to IRS), printing, and mailing of Forms 1099-MISC/1099-NEC, you must contract
with Nelco for their 1099 reporting services.
Nelco will produce a 1099-MISC/1099-NEC forms for each vendor/contractor. Nelco will print, stuff, stamp and mail forms for each vendor/contractor you select
Nelco will prepare an electronic file, in the IRS-required format, for filing Forms 1099 and 1096 with the IRS (under Nelco pre-approved "umbrella").
Payment
for Nelco services is between you and them and is separate from SkilMatch.
You should confirm pricing directly
with Nelco.
You will need to log in and create an
account.
There is a no "setup"
charge or annual fee, this provider is a full service for filing your
1099s.
A/P and P/B (temp and staff)
filing under the same EIN can be uploaded separately from SkilMatch to Nelco
and can be combined together into one "reporting" account through
Nelco.
REQUIRED SETUP FOR
IRS 1099 REPORTING
(Effective 2020):
The A/P vendor file will need to have the following setup to be included in 1099 reporting. These updates need to be made to vendor file BEFORE you close the year.
1) Vendor File includes full address for the vendor
2) Vendor File includes the EIN Number OR Social Security Number (SSN)
3) Vendor File marked to have 1099
4) Vendor File includes activity comment with ONE of the following Activity Comment Types (the comment type is critical, the comment itself can be anything; i.e. 1099 reporting):
@E if EIN Number is in vendor file
OR
@S if Social Security Number is in vendor file
5) Vendor File includes activity comment with ONE of the following Activity Comment Types (the comment type is critical, the comment itself can be anything; i.e. 1099 reporting):
@N if 1099-NEC is for Vendor with Non-Employee Compensation
@R if 1099-MISC is for Rent (1099 Box 1)
@A if 1099-MISC is for Attorney (1099 Box 10)
@O if1099-MISC is for Other Income (1099 Box 3)
The following are possible error messages that may result on A/P
Register if this setup is not complete; correction is
required to proceed:
*****
VENDOR NAME IS BLANK - CORRECTION REQUIRED *****
*****
COMPLETE VENDOR ADDRESS IS REQUIRED FOR 1099 - CORRECTION REQUIRED *****
*****
EIN/SSN FIELD IS NOT VALID, MUST HAVE 9 DIGITS - CORRECTION REQUIRED *****
*****
EIN/SSN 1099 DESIGNATION TYPE NOT FOUND IN COMMENT FILE - CORRECTION REQUIRED
****
*****
NO 1099 PAYMENT TYPE DESIGNATION FOUND IN COMMENT FILE - CORRECTION
REQUIRED****
This menu option, Forms and Media Creation, allows the users to “reprocess” the 1099 file as needed.
BUT
PLEASE NOTE, if you do “reprocess” the system will create a NEW file and
will use the SAME file name each time you run this option for each GL Payable
company/payment year.
Platinum users can only have one file on your server at a time. When you run this option for the second time for a GL Payable company/payment year, the system will message you to delete and replace
existing file. Please be sure to be aware of the existing file contents, do NOT delete unless you are sure it should be deleted (additional details below).
Web-based users (SME) will have a NEW file emailed to you EACH time you process this option. Be sure to track these emailed files, and keep the file uploaded to Nelco, delete the files not used/sent so they do not get mixed up when you have multiple files.
COMPLETE
THE 1099 “REQUIRED SETUP” –BEFORE- YOU CLOSE THE YEAR:
Your A/P 1099 file, Forms and Media Creation, can be created BEFORE or AFTER you “Zero Dollars Field” for vendor
files; HOWEVER, any updates
made to the vendor files AFTER the
year is closed will be made to the current file, NOT to the copied historical file record. The system will use the name, address
and 1099 setup (“Required Setup” explained above) that displays in the vendor’s
file at the time the year is closed.
SkilMatch assistance to correct prior year vendor files for 1099
reporting is billable.
Information about 1099s:
Unlike the A/P 1099 Register,
which cannot be printed for a single general ledger company, the A/P 1099 file CAN be created for a single general ledger company.
Click on the following topics to
move directly to that section of this document:
Locate
1099 File on File Server and Copy File to EOY 1099 Desktop Folder
CREATE
1099 FILE
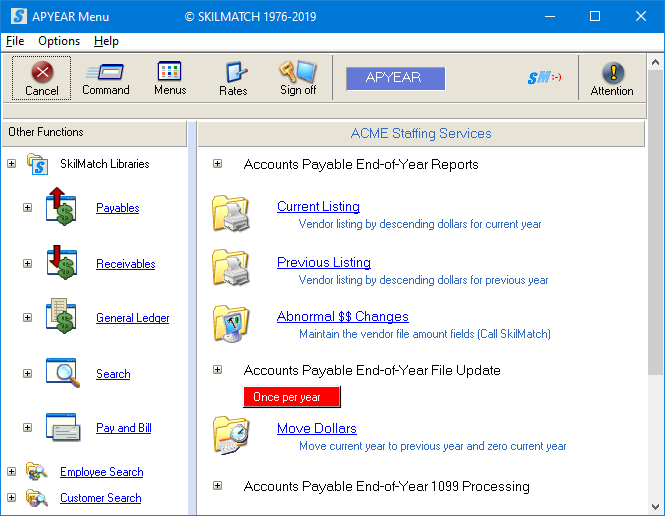
To begin, select the [End-Of-Year] menu in the Accounts Payable library, the screen will display:
Next, scroll down or right click and select [Forms and Media Creation].
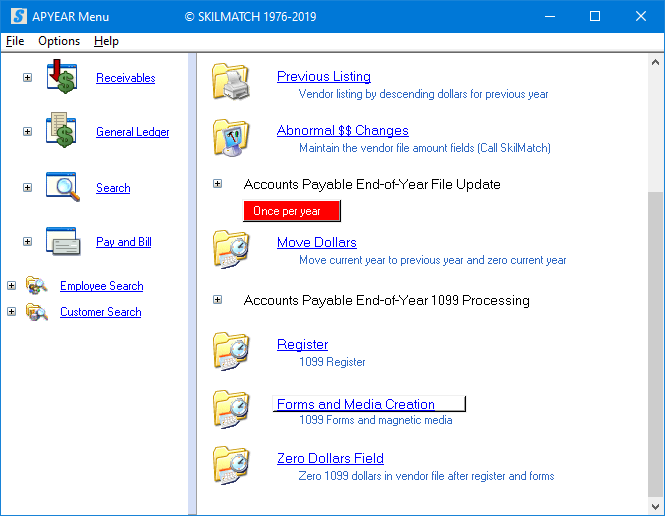
The screen will display:
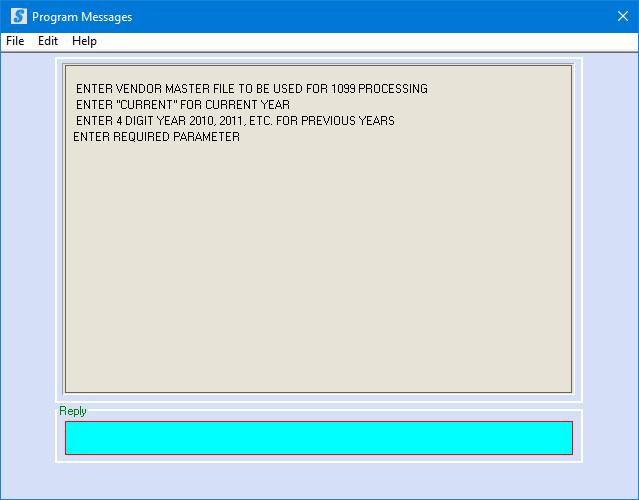
This option allows user to create an A/P 1099 file for current and prior years. The screen will ask user to enter the year for which you are attempting to process this 1099 file.
NOTE: SkilMatch programming handles both current
and prior year processing in the same manner, a file is created for upload to
Nelco.
To create a 1099 file for the CURRENT year, key CURRENT and press <Enter>.
OR
To create a 1099 file for a PRIOR year (a year that has been closed and zeroed), key the 4-digit year code (i.e. 2022, 2023…) and press <Enter>.
OR
To cancel processing and return
to main menu, leave blank and
press <Enter>.
You will receive confirmation the option is canceled, click [OK] and you will be returned to the
menu.
If you key CURRENT or a Four-Digit PRIOR year, the screen will display:
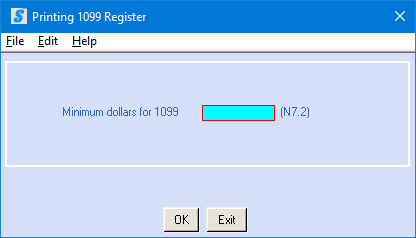
Minimum
Dollars for 1099:
The federal government requires that you send a 1099 to each vendor with whom you have spent a minimum number of dollars during a calendar year.
Key the yearly minimum dollar requirement. This is a numeric field, seven positions long - the last 2 positions are behind the decimal point.
Example: $600.00 would be keyed 60000.
Always
verify Federal rates and/or figures with the www.irs.gov website, to ensure
most current information.
To continue, click [OK].
OR
To cancel and return to main menu, click [Exit].
The screen will display:
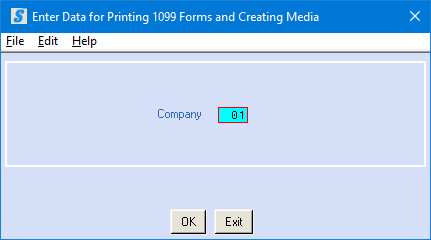
Company Number:
System defaults to company 01. Key the general ledger company number desired.
To continue, click [OK].
OR
To cancel and return to main menu, click [Exit].
If you select [OK] to continue, the screen will display:
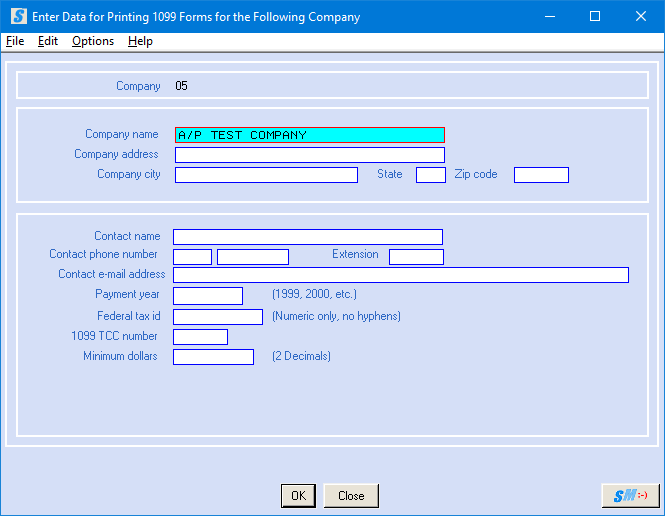
Company Name:
The company name is displayed from the A/P System file. Make any necessary changes.
Company Address:
Key the company address.
Company City:
Key the company city.
Company State:
Key the company state.
Company Zip Code:
Key the five-digit zip code.
Contact Name:
Key the name of the person in your organization that should be contacted by the IRS should questions arise about the 1099 file.
Contact Phone Number/Extension:
Key the contact’s
area code.
Key the 7-digit
phone number without punctuation.
Key any extension
number.
Contact Email Address:
Key the email of the person in your organization that should be contacted by the IRS should questions arise about the 1099 file.
Payment Year:
Key the four-digit payment year.
NOTE: The SkilMatch program allows
user to create CURRENT and PRIOR year 1099s. Be sure to key the correct year for which you
are creating the 1099 file.
NOTE: SkilMatch programming handles both current
and prior year processing in the same manner, a file is created for upload to
Nelco.
Federal Tax ID:
Key the company federal tax identification number without dashes.
NOTE: Make certain there are no
hyphens or letters or your federal ID will not be written to the PC file
correctly.
1099 TCC number:
Key the 1099 TCC
number assigned to you by the IRS. If
you are not reporting vendor 1099 data to the IRS electronically, and do not
have a TCC number, key the word NONE in this area.
Minimum Dollars For 1099:
Key the minimum number of dollars that are required for reporting.
Example: $600.00 is keyed as 60000
Always verify Federal rates and/or figures with the
www.irs.gov website, to ensure most current information.
To continue, click [OK].
OR
To return to previous window and select a different company number, click [Close].
If you select [OK] to continue:
NEW with 2020
programming, this option will review the 1099 records and create a
1099 Register to verify setup is complete. If you receive an error message, this option
is cancelled and you will return to menu.
You will receive a
Register (AP762) in your print output queue showing the errors and will need to
review and correct before a 1099 file can be created.
If NO errors occur, you will proceed to the 1099 file creation, the screen will display:
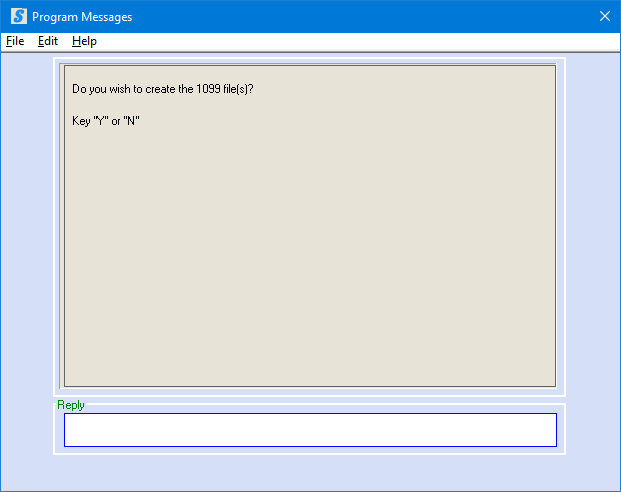
To create the 1099 file(s), key Y and press <Enter>.
OR
To cancel and return to menu, key N and press <Enter>.
If you keyed Y, the screen will display:

NOTE: AP 1099 MISC file, AP1099MISC0120 (01 = Company #; 20 = Year, i.e. 20 = 2020)
AND/OR
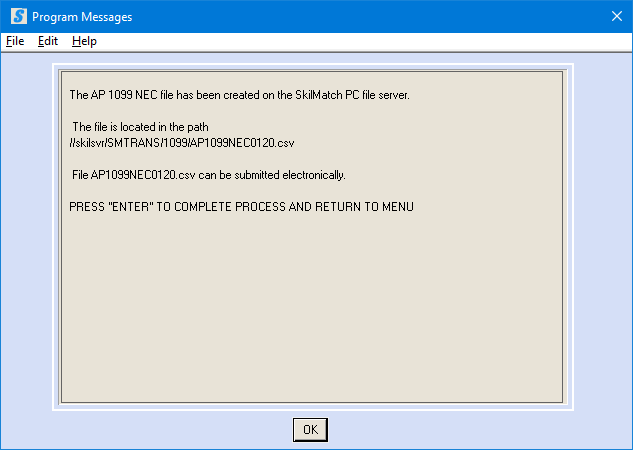
NOTE: AP 1099 NEC file, AP1099NEC0120 (01 = Company number; 20 = Year, i.e. 20= 2020)
WE RECOMMEND THAT YOU MOVE
YOUR CURSOR TO THE TOP LEFT CORNER OF THE SCREEN, CLICK THE SM2 SYMBOL AND MAKE A PRINT OF THIS SCREEN SO THAT YOU HAVE A COPY OF
THE “PATH”.
The system will create a .csv file customized to use with Nelco programs (third party service partner).
Possible files created:
1099-MISC AP1099MISCxxyy (xx = Company number; yy = Year, i.e. 21 = 2021)
1099-NEC AP1099NECxxyy (xx = Company number; yy = Year, i.e. 21 = 2021)
NOTE: When you process 1099 option in A/P, IF you have both NEC vendors and MISC vendors within a company, the system will create the 2 files listed above
NOTE: The SkilMatch system will NO LONGER generate 1099 Forms.
NOTE: The SkilMatch system will NO LONGER generate 1099 Federal Filing report.
When you are back to menu, the system will generate a 1099 Register and 1099 file.
Review the Register to confirm the data on your 1099 file (review for possible issues).
Locate the 1099 file to be uploaded to Nelco.
SME user will have it emailed to them and Platinum user will be able to locate file in their SMTRANS/1099 folder (see details below).
REPEAT as needed for EACH G/L company number.
LOCATING
THE FILE and COPY to EOY 1099 FOLDER
The system will create a .csv file customized to use with Nelco programs (third party service partner).
When file uploaded to Nelco website it will create:
- A Federal File to upload to IRS
- 1099-MISC and 1099-NEC Forms
The .csv file is delivered to you as follows:
Platinum Users (own their
AS400):
No additional setup needed, you will need to locate this file on the SkilMatch PC File Server after you have processed the Forms and Media Creation option.
The file will be located at your SkilMatch Server SMTRANS/1099/ folder (where xx=general ledger company number; yy=last two digits of the 1099 year being reported).
For instructions on how to locate file on file server, click file server.
Web-based Users (SME):
The 1099 file will be emailed to you (the address setup in EMAILMAINT) when the file is complete. To update and/or verify the email address setup in your
SkilMatch system, refer to the following link; EMAILMAINT. The EMAILMAINT option enables you to receive certain SkilMatch created files via automatic email without notification to,
or assistance from, SkilMatch support.
Locate for the file name(s) that were displayed during the processing of the 1099 file.
Copy to your desktop folder EOY 1099. It is not necessary to rename the file.
Once you have copied these files to your desktop
EOY 1099 folder, you are ready to upload to Nelco (Nelco will file with IRS
and create/mail 1099 forms).
UPLOAD
1099 FILE to NELCO
When you have completed creating all 1099 files
and are ready to start your upload to Nelco, complete the following
steps.
NOTE: SkilMatch staff will be your support contact
for all assistance with the Nelco upload/filing. Call the SkilMatch office as you would with
all other support issues. All SkilMatch
support and assistance with Nelco reporting is billable.
VIEW Nelco training
video, which
demonstrates Account Creation and the FULL File Upload process. The following written instructions contain
general steps-by-step instruction and are not intended to be a full explanation
of the steps needed to complete upload/filing of 1099s.
Nelco
Account Creation and File Upload Training: Nelco
1099 Upload Training Video
Select Create
Account on the Nelco website. https://skilmatch.nelcoportal.com/
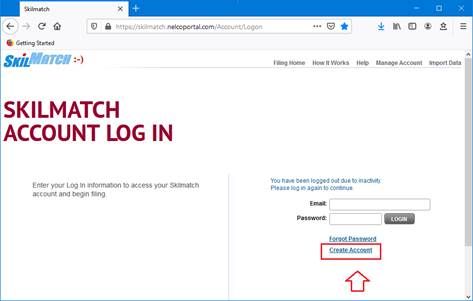
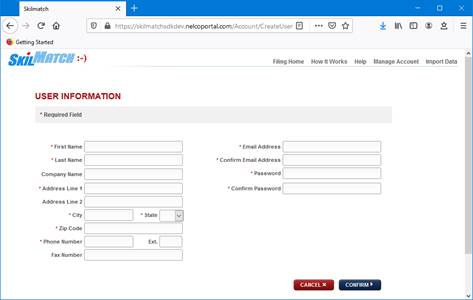
Complete User Information, Confirm and Accept
licensing agreement.
When you logged in to Nelco, you will start on
your Filing Home page.
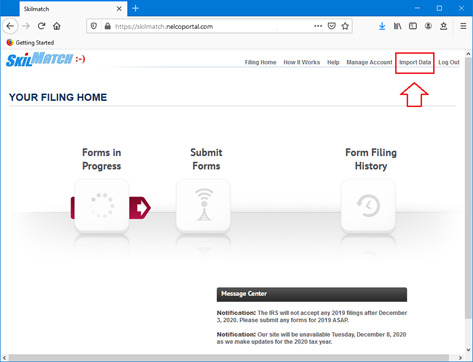
The webpage shows 3 large icons on the “Filing
Home” page:
Forms in Progress – shows you the data file information
currently imported, but not yet submitted.
Select the services you want and the files that will be included for
reporting.
Submit Forms – shows the forms that have been
imported and prepared for submitting.
Form Filing History – shows the status of files submitted and are
in progress.
NOTE: These icons are only “active (highlighted)”
when they contains data to work with, otherwise they will remain greyed out and
inaccessible. If you have NO “Forms
in Progress” then it will not be active.
If you have imported data, “Forms in Progress” will be active for
access (i.e. If you have submitted all
your uploaded data to the IRS, you will no longer have access to “Forms in
Progress” or “Submit Forms”).
Select Import Data in upper right corner to upload your FIRST
SkilMatch file.
Browse PC desktop to locate the EOY 1099 folder,
select and open file (created in steps above).
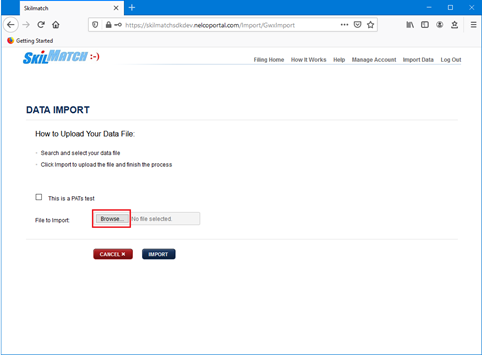
Select the SkilMatch 1099
file to import ( i.e. PB1099NECxxyy, ST1099NECxxyy, AP1099MISCxxyy, AP1099NECxxyy) select Open and select Import.
Select the “Federal
E-filing, Recipient Mail, & Online Retrieval” Bundle option on the left (A la cart options
available, but SkilMatch recommends the bundle indicated above).
REMINDER: No STATE Filing for 1099-MISC/1099-NEC, see Important
Information section for details.
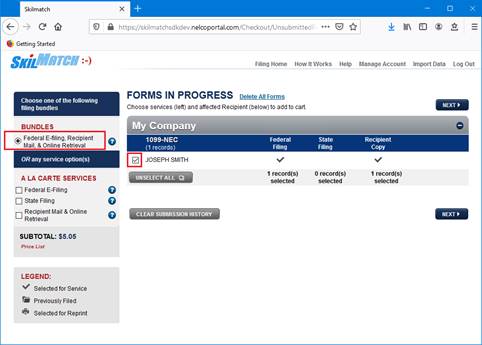
Review your records…
you can select or de-select vendors/names listed as needed.
When ready to proceed, select Next. (See legend, bottom left corner for
assistance.)
NOTE: If the imported records contain emails for
ALL vendors/contractors, you will NOT receive the following email review
option. If you have records that are
missing email address, then you will have the following screen to add emails to
records.
NOTE: Update as needed
in the Add/Edit Emails option below subtotals.
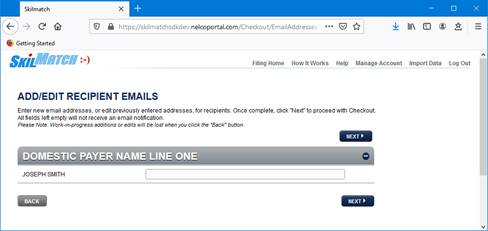
When complete, select Next.
CRITICAL: Do NOT proceed with credit card
information until all files have been uploaded for this EIN/Company
Number.
REPEAT STEPS ABOVE starting
with Import Data option and upload
ADDITIONAL SkilMatch files (i.e. Payables/Payroll) for the same company
number and complete the selection process, steps “B-E” above.
** WHEN ALL FILES IMPORTED FOR THIS EIN/COMPANY, CONTINUE **
Submit Forms option
gives you access to Preview Forms, Summary Report, and Detail
Report.
Review these forms to confirm data looks as intended.
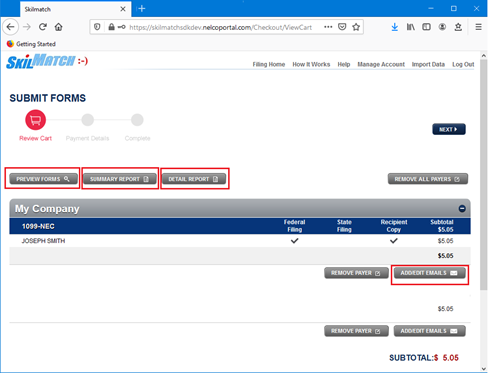
When READY, have fully reviewed AND uploaded all files for this
EIN/Company number… click Next to check out through the Nelco Cart and complete the
transaction.
Note: If you need to start this process over, you
have the option to “Remove All Payers” on right-middle side of
screen. Select this option/confirm and
start over the Import Data option.
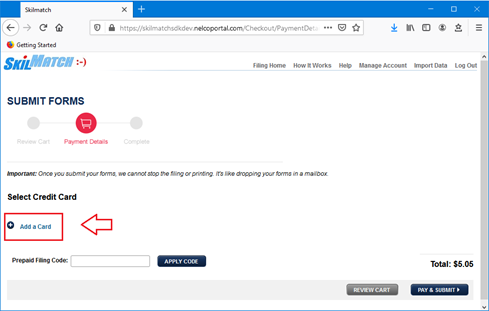
Complete the checkout with
Add a Card option to finalize this
full process for this EIN/Company Number.
*The
Federal file is set to submit to the IRS upon checkout. No additional steps are needed.
*The
1099 Forms have started the process for print/mail to vendors/contractors, no
additional steps needed.
**REPEAT this full process for EACH EIN/Company Number**
CHECK BACK with Nelco to
confirm acceptance of your file in the Form Filing History. You will also receive mail notifications from
Nelco regarding status of federal filing and forms.
This webpage also give you access to
effortlessly print/email 1099 forms at a later date, upon vendor/contractors
request.
NOTE: 1099 files/data available online for 3 years
for future access.