INTRODUCTION TO CHANGING LOCKBOX CASH RECEIPT ENTRIES
This option allows you to select a specific lockbox cash receipts file and make changes to the entries in the file.
Use your Lockbox Checks
Report (LB010) and your Cash Receipts Edit Listing (AR220 – which displays the
sequence number for each entry) to know which cash receipt entries need changes
prior to posting.
HOW TO CHANGE LOCKBOX CASH RECEIPT ENTRIES
To begin,
on the “Accounts Receivable Master” menu, click [Transactions].
The
screen will display:
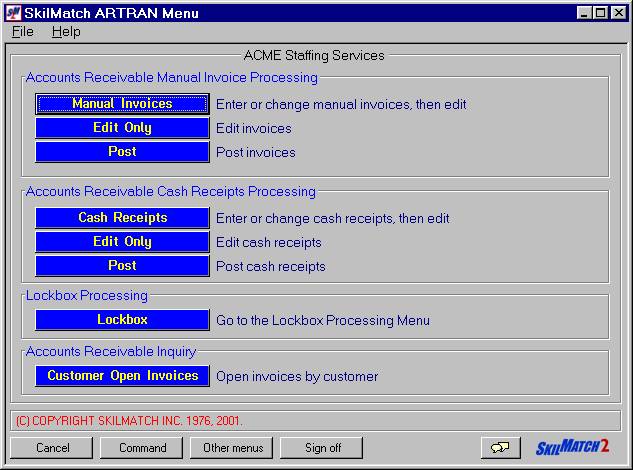
Click [Lockbox].
The
screen will display:
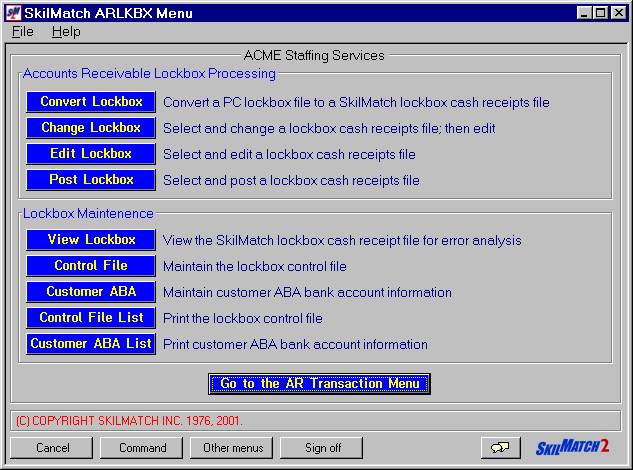
Click [Change Lockbox].
The screen will
display:
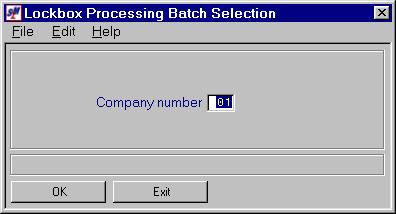
Company Number:
Defaults to company 01. If you wish to reconcile checks for a different company, key the desired company number.
To NOT continue, click [Exit]. You will be returned to the “Accounts
Receivable Lockbox Processing” menu.
To continue, click [OK].
The screen will display:
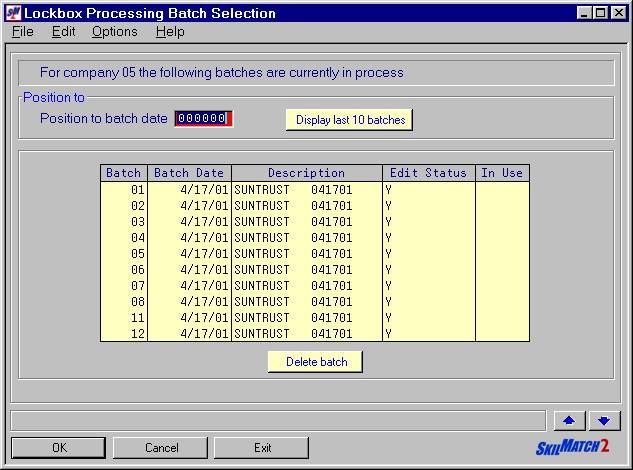
Position To:
If the
desired cash receipts batch does not appear on the first screen, you may <Page
Down> by clicking the ![]() button
button
OR
You may enter a batch date in the position to area and click [OK].
OR
You may display the last 10 batches by clicking [Display Last 10 Batches].
Delete Batch:
To delete a batch, click once on the desired batch to highlight it and
then click [Delete
Batch].
The screen will display:
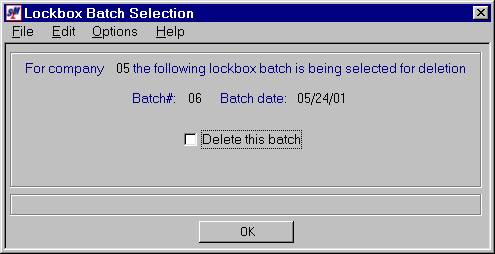
To continue deleting this batch, click once on ‘Delete This Batch’ to
select (a checkmark will display next to the selection) and
click [OK].
To NOT continue deleting this batch, leave the screen as it appears
(no checkmark displayed next to Delete this batch) and click [OK].
To Select The Desired
Cash Receipts Batch:
To NOT continue, click [Exit]. You will be returned to the “Accounts
Receivable Lockbox Processing” menu.
To select a cash receipts batch for a different company number, click [Cancel]. You will be returned to the previous screen
where you may key a different company number.
To continue, click once on the desired batch to highlight it and then
click [OK].
OR
<DOUBLE CLICK> on the desired batch to select.
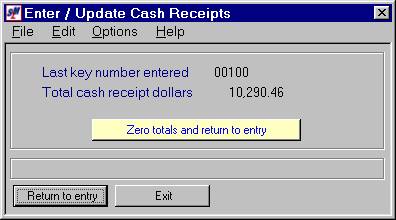
The screen will display:

Last Key Number
Entered:
Displays the last key
number in this batch.
Total Cash Receipt
Dollars:
Displays the total cash
receipt dollars in this batch.
To NOT continue, click [Exit]. You will be returned to the “Accounts
Receivable Lockbox Processing” menu.
To continue, without
zeroing the cash receipt totals, click [Return to Entry].
This will take you to the cash receipts entry screen. Once all cash receipts are changed and you
exit, the totals will display the total of ALL cash receipts in the batch, not
just the total of the changes made.
To continue, with zeroing the cash receipt totals, click [Zero Totals and Return To Entry]. This
will not delete any records from the batch, but will set the total to zero and
take you to the cash receipts entry screen.
Once all cash receipts are changed and you exit, the totals will display
ONLY the total of the changes made, not the total of all cash receipts within
the batch.
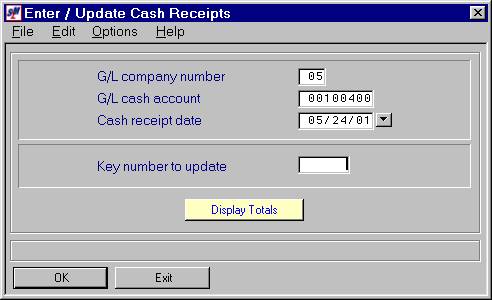
If you chose to continue, the screen
will display:
Note: SkilMatch recommends you do NOT add any records to a lockbox cash receipts batch, but that you only change existing records in the lockbox batch.
G/L Company Number:
Defaults to the
company number used when this lockbox was converted. Do NOT change this data.
If you change the
company number, records already in the batch will NOT be affected, only new
entries would be affected. SkilMatch
recommends you do NOT add any records to a lockbox cash receipts batch.
Press the
<TAB>
key for additional keying.
G/L Cash Account:
Displayed is the default cash account for the G/L company
number displayed. Do NOT change this data.
If you change the
cash account, records already in the batch will NOT be affected, only new
entries would be affected. SkilMatch
recommends you do NOT add any records to a lockbox cash receipts batch.
Press the
<TAB>
key for additional keying.
Cash Receipt Date:
The cash receipt
date will default to the date in the lockbox file. Do NOT change this data.
If you change the
cash receipt date, records already in the batch will NOT be affected, only new
entries would be affected. SkilMatch
recommends you do NOT add any records to a lockbox cash receipts batch.
Press the
<TAB>
key for additional keying.
Key Number to Update:
Key the sequence number (key number)
of the item to update. The key numbers
appear on the cash receipts edit listing (AR220).
To NOT continue, click [Exit]. You will be returned to the “Accounts
Receivable Lockbox Processing” menu.
To continue, click [OK].
The screen will display the retrieved
record:
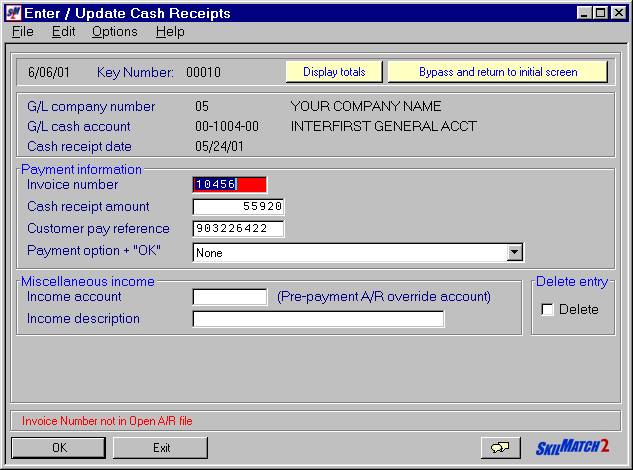
Note:
SkilMatch recommends you do NOT delete any records from a lockbox cash
receipts batch. If the problem cannot
be resolved, leave the record in the cash receipts batch and post. Your cash receipts register will list the
items that did NOT post in addition to the items that did post. This information may prove helpful for future
reference.
If any data is incorrect, move the
cursor to the field in error and make the correction.
Click [OK].
Continue with this procedure until
all deletions/corrections have been made.
When you exit, the
screen will display:
To return to entry, without
zeroing the cash receipt totals, click [Return to Entry].
This will take you to the cash receipts entry screen. Once all cash receipts are changed and you
exit, the totals will display the total of ALL cash receipts in the batch, not
just the total of the changes made.
To return to entry, with zeroing the cash
receipt totals, click [Zero Totals and
Return To Entry]. This will not delete any records from the
batch, but will set the total to zero and take you to the cash receipts entry
screen. Once all cash receipts are
changed and you exit, the totals will display ONLY the total of the changes
made, not the total of all cash receipts within the batch.
To continue exiting, click [Exit]. You will
be returned to the “Accounts Receivable Lockbox Processing” menu.