INTRODUCTION TO POSTING LOCKBOX CASH RECEIPTS
This option:
(1) posts cash receipts to the general ledger
(2) updates accounts receivable
(3) updates customer files
(4) produces a Cash Receipt Register (which you should keep in your
cash receipts binder)
Note: it is
recommended that you post lockbox cash receipts as they are received. Lockbox cash receipts should be posted in
order by date. If you post an “old”
lockbox cash receipt batch, be sure to re-edit all “newer” lockbox cash receipt
batches before posting. The status of
cash receipts in the newer batches may have changed by the posting of the older
batch.
The top section of the Cash Receipt Register will display the
following data: batch number, fiscal
month & year, the date & time the posting took place, and the initials
of the user who was signed on when the posting occurred.
The Cash Receipt Register also prints the customer code and name, the
invoice number that received payment, cash receipt date and amount, the
original invoice date, the invoice balance before & after posting, late fee
amounts & dates, any amount paid over or under the invoice balance, the
customer pay reference data, the general ledger accounts affected, and the
general ledger journal numbers.
Note: any record on the cash receipts edit listing (produced when cash receipts were entered) marked: "WILL NOT BE POSTED” will appear on the Cash Receipt Register marked “RECORD NOT ADDED".
HOW TO POST CASH RECEIPTS
To begin,
on the “Accounts Receivable Master” menu, click [Transactions].
The
screen will display:
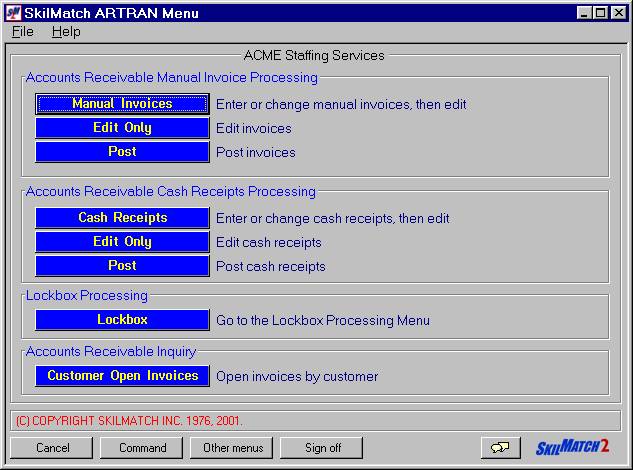
Click [Lockbox].
The
screen will display:
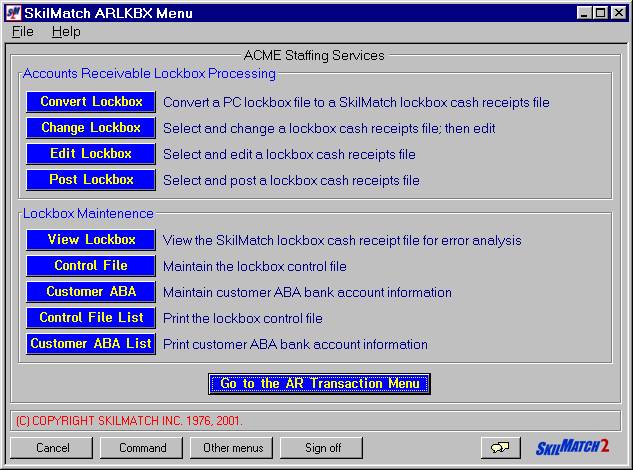
Click [Post Lockbox].
The screen will
display:
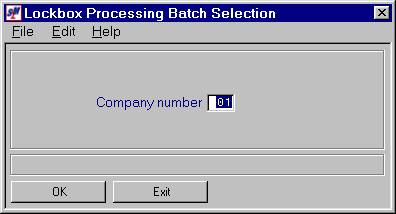
Company Number:
Defaults to company
01. If you wish to post cash receipts
for a different company, key the desired company number.
To NOT continue, click [Exit]. You will be returned to the “Accounts
Receivable Lockbox Processing” menu.
To continue, click [OK].
The screen will display:
Position To:
If the
desired cash receipts batch does not appear on the first screen, you may <Page
Down> by clicking the ![]() button
button
OR
You may enter a batch date in the position to area and click [OK].
OR
You may display the last 10 batches by clicking [Display Last 10 Batches].
Delete Batch:
To delete a batch, click once on the desired batch to highlight it and
then click once on the desired batch to highlight it and then click [OK].
The screen will display:
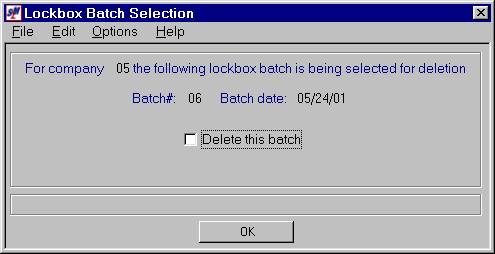
To continue deleting this batch, click [Delete This Batch] (a checkmark will display next to
the selection) and click [OK].
To NOT continue deleting this batch, leave the screen as it appears
(no checkmark displayed next to Delete this batch) and click [OK].
To Select The Desired
Cash Receipts Batch:
To NOT continue, click [Exit]. You will be returned to the “Accounts
Receivable Lockbox Processing” menu.
To select a cash receipts batch for a different company number, click [Cancel]. You will be returned to the previous screen
where you may key a different company number.
To continue, click once on the desired batch to highlight it and then
click [OK].
OR
<DOUBLE CLICK> on the desired batch to select.
The screen will display:
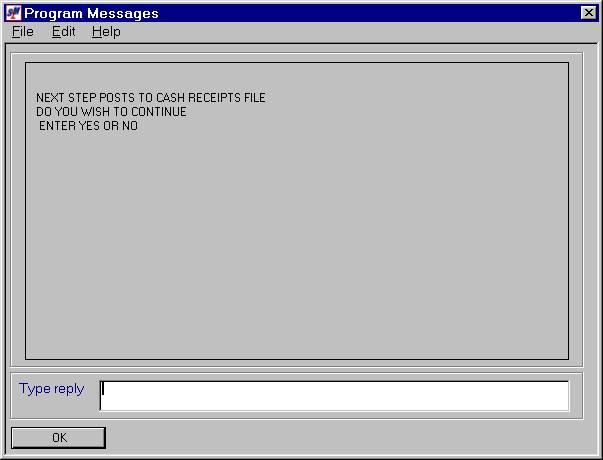
If you have inspected your edit for error messages and
are ready to post, key YES and click [OK].
If you do NOT want to post, key NO and click [OK].
If you keyed YES, the screen will display:
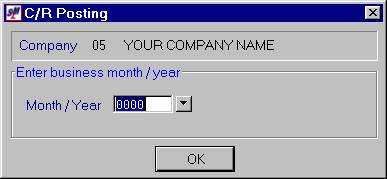
Enter Business
Month/Year:
Key the appropriate fiscal month and year.
OR
Select a date by clicking the ![]() button (prompt and select button) to the
right of dates throughout SkilMatch2. The
button (prompt and select button) to the
right of dates throughout SkilMatch2. The ![]() button will display a calendar from which you
may click on a date to select, and then click [OK] to key the date.
button will display a calendar from which you
may click on a date to select, and then click [OK] to key the date.
Note: remember
that this will not always correspond to a calendar year, but is determined
strictly by when your fiscal year begins. Example: if your fiscal
year 1986 begins in June, then July will be keyed as 0286.
Click [OK].
The screen will display:
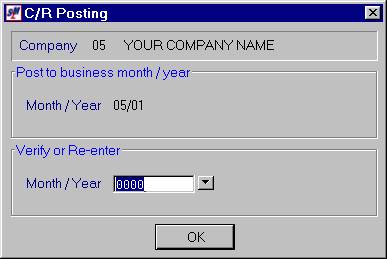
If the date displayed in the top portion of the screen is correct,
click [OK].
If the date displayed is NOT correct, re-key the date and click [OK].
Each time you re-key the date, the date will redisplay for
verification. When the displayed is
correct, click [OK].
OR
Select a date by clicking the ![]() button (prompt and select button) to the
right of dates throughout SkilMatch2. The
button (prompt and select button) to the
right of dates throughout SkilMatch2. The ![]() button will display a calendar from which you
may click on a date to select, and then click [OK] to key the date.
button will display a calendar from which you
may click on a date to select, and then click [OK] to key the date.
Note: every time you change
the date the system will re-display it for verification.
The cash receipts data will be posted and you will return to the “Accounts
Receivable Lockbox Processing” menu.