DATA ENTRY OF GENERAL LEDGER JOURNAL ENTRIES
While most entries into the
SkilMatch general ledger are posted automatically as a result of other
SkilMatch accounting functions, you will have journal entries that must be
posted manually. This option allows you
to enter, then edit, journal entries before posting into the general
ledger. When you exit this option, the
system will create a General Journal Transaction edit report (named GL110) that
will display in your outqueue.
SINGLE BATCH AT A TIME:
Only a single data entry
batch is permitted at any given time.
This does not mean one batch per G/L company number; it means one single
batch whose entries belong to the same fiscal month and year, and are within
the same G/L Company. If you have
entries that need to be posted to more than one fiscal month/year or different
G/L company numbers, then you will need to enter, edit, then post one batch
before starting the data entry of another.
REFERENCE NUMBER REQUIRED:
When entries get posted
automatically to the general ledger through other SkilMatch accounting
functions (like Accounts Receiveable or Cash Disbursements), the program
assigns a 2-character source code and a 2-digit batch number. The 2-digit number (00-99) is assigned in
sequential order, and when the number gets to 99, the system will start over
again with 00.
The source codes are:
AR = Accounts Receivable
invoices
CR = Cash receipts
AP = Accounts Payable invoices
CD = Cash Disbursements
PR = Payroll (used for both temp
payroll and staff payroll)
When reviewing General Ledger
Distribution reports, you can easily identify how the entry got into the
general ledger by looking at the source code and batch number. Example:
AR55 means the posting is A/R Invoices, and the detail of the posting is
on Batch 55.
For manually posted journal
entries, the system assigns a source code of GL. The system does NOT, however, assign a batch number. Instead, you will be asked to assign a 3-digit
reference number to each entry. With
the exception of 000 and 999 (which are restricted for program use), any number
from 001-998 may be assigned.
SkilMatch recommends that you
create your own list of reference numbers to use with manual journal
entries. These reference numbers are
not mandated by SkilMatch, and are not pre-defined in any kind of a table. Reference numbers have 2 purposes: 1) to
assist you when reviewing Distribution reports to recognize the kind of entry
that was posted, and 2) for the system to match up the debits and credits of an
entry for balancing purposes. For
example, you might chose to reserve the number 001 for your annual “Beginning
Balance” entry. Number 200 could
indicate your monthly reallocation of corporate staff payroll expenses.
SkilMatch support staff will not
be able to tell you what your reference numbers represent since the system does
not require the numbers to be pre-defined.
You will need to review past postings in order to decipher the reference
number meaning.
The
following is a list of the different features described in this documentation:
How To Enter Beginning Balances For a New
Year
How To Enter Beginning Balances
Before The Year is Closed
New SkilMatch Customer Beginning Balance
entry
HOW TO ENTER or EDIT GENERAL JOURNAL DATA
To
begin, on the “General Ledger Master” menu, click [Journal Entry].
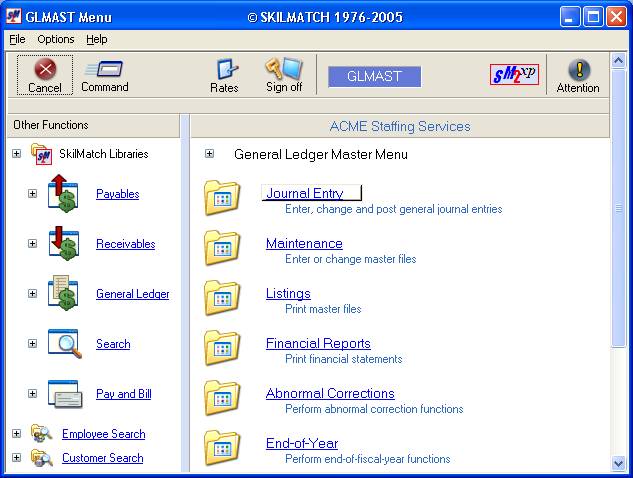
The
screen will display:
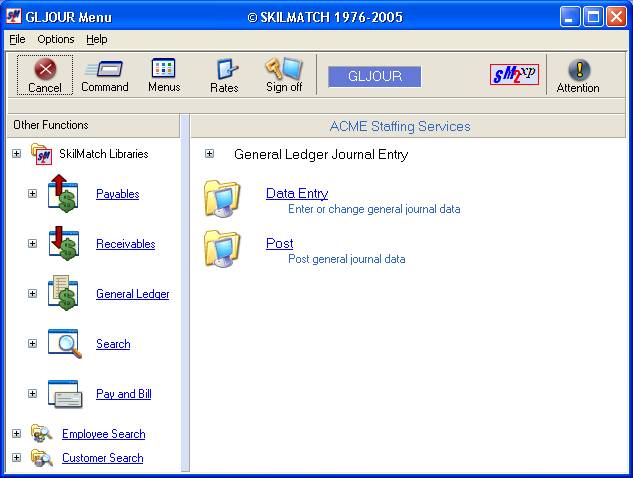
Click [Data Entry]. The screen will display:
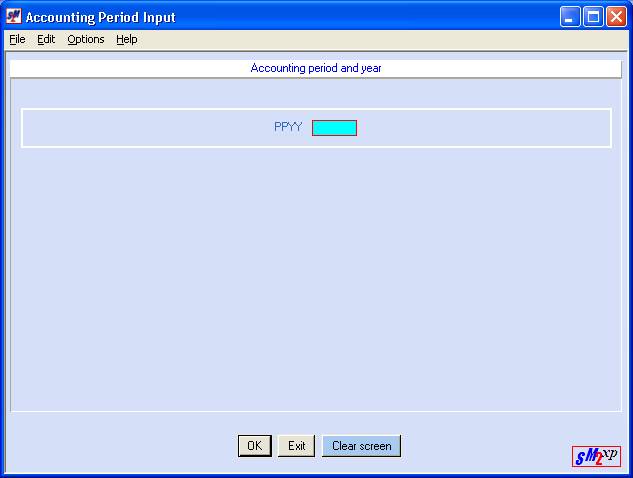
PPYY:
Key the fiscal period and year
to use when posting these journal entries
To proceed, click [OK].
To not proceed, click [Exit]. You will be returned to the “General Ledger
Journal Entry” menu.
If at any time during the entry
of data you wish to erase the screen and start fresh, click [Clear Screen].
WARNING OF DIFFERENT
FISCAL DATES:
If you clicked [OK],
then the system will look to see if there is an unposted batch of journal
entries. If one is located, then the
system will check whether or not the existing batch is for the same fiscal
period and year. If the fiscal month or
year is different from the existing batch, the screen will display:
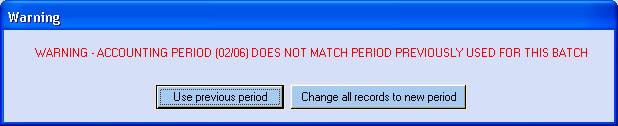
One of three situations
exists. Either you neglected to post
the previous batch, or you keyed the previous batch using the wrong fiscal
date, or you keyed the wrong fiscal date just now.
If you want the entries to post
using the period already in use, click [Use Previous Period].
If you wish to change the period
for the records already in this file to the period displayed in the warning
message, click [Change All Records
To New Period].
If you do not know what period
is currently in use, refer to the edit list produced when you last exited this
program. If you cannot locate the edit,
click [Use
Previous Period] to continue, then click [Exit]. From the Totals screen, click [Totals are
correct/End and return to menu]. You will be returned to the “General Ledger Journal Entry” menu,
and a new edit report will be created.
Use these same instructions if you need to cancel and post the existing
batch before adding new entries.
If the WARNING screen
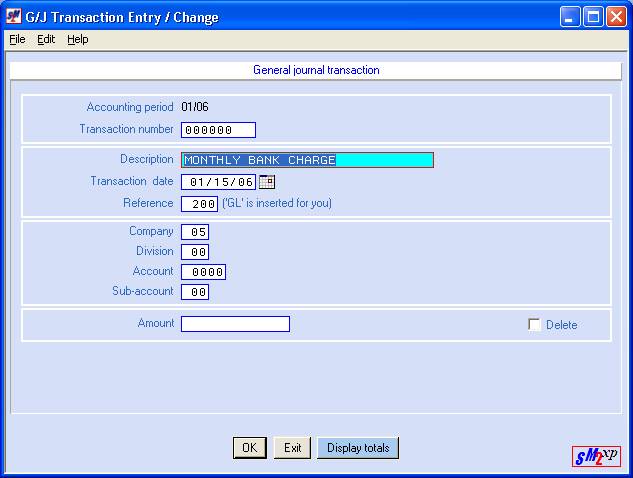
does not display, then you will go straight into data entry. The screen will display:

(The cursor will be positioned
at Description, not Transaction number.
The Transaction number area is only used to bring up previously keyed
entries.) Key up to 30 characters of
description. The description will print
on the G/L Distribution source register.
Transaction Date
Key the transaction date. Use the format MMDDYY.
OR
Select a
date by clicking the ![]() button (prompt and select button) to the
right of dates throughout SkilMatch2. The
button (prompt and select button) to the
right of dates throughout SkilMatch2. The ![]() button will display a calendar from which you
may click on a date to select, and then click [OK]
to key the date.
button will display a calendar from which you
may click on a date to select, and then click [OK]
to key the date.
Reference (GL is inserted for you)
Key a 3-digit number (001 to
998) to represent the type of entry you are keying. Do not use 000 or 999. (See discussion on reference numbers at
the beginning of this document.) You
must assign the same reference code to all entries that relate to the same
transaction. If you do not, the system
will find the entry out of balance. It
is not a problem to have multiple reference numbers in a batch.
Company
Key the 2-digit G/L company
number to which this entry will be posted.
Division
Key the 2-digit division
number (00 for balance sheet, 01-89 for income and expense account).
Account
Key the 4-digit account number.
Sub-Account:
Key a sub-account number, if
applicable, or key 00.
(To verify that you have keyed
the correct account number, press the <ENTER>
key after keying the sub-account number and the system will display the description
from the chart of accounts (to the right of the division field.)
Amount:
Key the amount of the item. Be sure to use spaces to hold zeroes, and do
not use a decimal point. If the amount
needs to have a minus sign, press the <->
key on the keypad to the right side of your keyboard after you have keyed the
amount. (Do not use confuse the
keyboard ‘dash’ with the keypad’s minus sign.)
Click [OK] to add this entry.
Click [Exit] to end data entry
without adding this transaction.
Click [Display totals] to check
the amounts of the debits and credits in this data entry batch.
If you selected [OK],
then a new screen will display with some of the data from the previous
screen. The cursor will be positioned
at description.
Since every transaction will
have a minimum of 2 entries, the system will bring forward data from the
previous entry to save you from having to re-key information. Use the <TAB>
key to move forward to the next area.
When you have completed the
screen, click [OK] to add this transaction.
Repeat the preceding
instructions for additional entries related to the same transaction. Remember that all entries pertaining to the
same transaction must have the same reference number!
Display Totals:
We recommend that you balance as
you go along. Click [Display
Totals] at the end of each complete transaction or at the end of
entries for a specific reference number.
The screen will display:
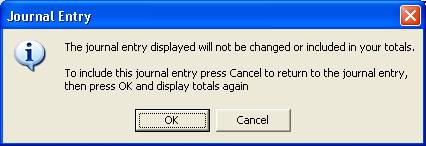
This window serves as a reminder
that if you did not click [OK] on the previous screen, then your entry
has not been added, and will not be a part of the upcoming totals. Either click [OK] to continue without
adding the entry displayed, or click [Cancel] to add the transaction before
continuing to the totals screen.
Once you have clicked [OK] on the reminder screen, the totals screen
will display:
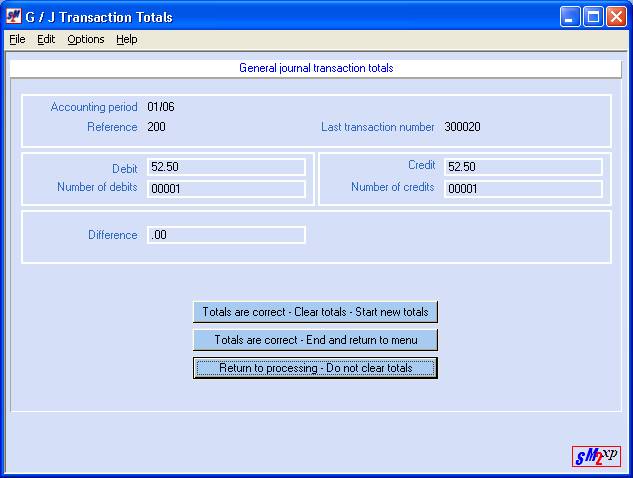
TOTALS ARE CORRECT-CLEAR
TOTALS-START NEW TOTALS
(The
system will automatically start a new set of totals when you change to a new
reference number.)
If the amounts are correct, and
you wish to zero out the totals before continuing, click [Totals are correct-Clear totals-Start new
totals].
TOTALS ARE CORRECT-END AND
RETURN TO MENU
If the amounts are correct, and
you are finished with entry, or you are finished for now, but want to add more
entries later (before posting), click [Totals are correct/End and return to menu].
RETURN TO PROCESSING-DO NOT
CLEAR TOTALS
If the amounts are correct and
you wish to continue with entry without resetting the amounts back to zero,
click [Return
to processing/Do not clear totals].
If the amounts are incorrect,
and you wish to correct them, click [Return to processing/Do not clear totals].
CHANGING OR DELETING AN EXISTING ENTRY:
If your totals were not correct,
you may re-access the entry screens to make corrections. To bring up an existing entry, you must key
a transaction number assigned by the system.
Each entry is assigned a Transaction number in multiples of ten (010,
020, 030, 150, 870, etc).
If the entry has not been
through an edit process, when occurs when you end and return to menu, then you
will add a 300 to the beginning of the transaction number. The first entry is 010, the second is 020,
etc with the number 300 attached to the beginning of the number (example 300010,
or 300020). Make your best estimate of
the entry you wish to view.
If the entry has been through an
edit process, then you should refer to the edit report to obtain the current
Transaction number. The system will
group together all entries that belong to the same Reference number. This means that the Transaction number
assigned to an entry could change each time the batch is edited.
It would not be unusual to have
a current entry with a transaction number of 300010, as well as an existing
entry with a Transaction number of 10.
<TAB> the cursor back to Transaction
number and key the number. Click [OK] after you have keyed the Transaction number.
CHANGES: Use the <TAB> key to
position your cursor in the area that needs a change. Make the necessary changes, then click [OK]. Click [Display Totals] again to re-verify your
batch totals.
DELETION: If necessary, you may delete an existing
entry or a partially keyed entry. Once
the entry is displayed, click once on the box beside DELETE to select (a
checkmark will display next to the selection).
Click [OK]. The item will be deleted and your cursor
will return to Description.
EXIT AND RETURN TO MENU:
When you have finished entering
new items, and correcting or deleting existing items, click [Exit]
to end data entry. The system will display
the reminder screen:
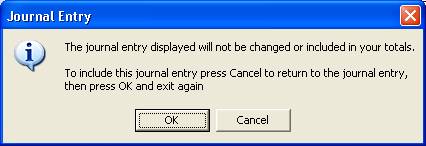
This window serves as a reminder
that if you did not click [OK] on the previous screen, then your entry
has not been added, and will not be a part of the upcoming totals. Either click [OK] to continue without
adding the entry displayed, or click [Cancel] to add the transaction before
continuing to the totals screen.
Once you have clicked [OK] on the reminder screen, the totals screen
will display. Click [Totals are
correct-End and return to menu]. The screen will display:
Click [OK]. You will be returned to the “General Ledger
Journal Entry” menu. A ‘General Journal
Transaction Edit (GL110) will display in your outqueue. Please review this report carefully to make
certain you are in balance and there are no error messages, before proceeding
to the posting option.
BEGINNING
BALANCES FOR NEW FISCAL YEAR AFTER CLOSING THE OLD YEAR
Beginning balances are not automatically brought
forward when a fiscal year is closed.
Beginning balances are entered manually.
You will need information from 3
reports – (1) the final Trial Balance report that was produced as part of your
closing year steps, and the final Financial Statement of the year that was
closed. (The first step of closing the
year was producing a final Trial Balance; this is the report you need, NOT one
produced afterwards). Your beginning
balances are put in only for asset and liability accounts (1,000, 2,000 &
3,000 accounts). You will use the
figures in the YTD ACTUAL column on the Trial Balance. (2) You will need the net loss/gain figure
from the final Financial Statement of the fiscal year that was closed. (3) Print a copy of your G/L Tailoring
file. You need to see whether the net
loss/gain figure on the financial statement has been set to reverse the sign (positive
or negative) when the statement is printed.
You will need this information when keying the journal entry.
Beginning Balances are entered
into the system as a journal entry.
Using the Trial Balance, you will key an entry for each account number
below 4000 that has an amount in the ‘YTD Actual’ column. These figures represent the beginning
balances for the new fiscal year.
Complete the entry screens as follows:
Accounting Period And Year:
Key 01xx (where xx denotes the
new fiscal year).
Description:
We recommend you use
"Beginning Balance "FY xx" (where xx denotes the new fiscal
year).
Transaction Date:
Key the last day of the previous
fiscal year. If you are entering
beginning balances for fiscal year '06, use 123105 as the transaction date. This will place this entry at the beginning
of your GL entries on your GL Distribution List reports.
Reference:
Key the number you have decided
to use to represent beginning balances.
(Do not use 000 or 999.) Use the
same reference number on all of the beginning balance entries.
Company/Division/Account/Sub account
Make an entry for every account
number below 4000 that has an amount in the YTD ACTUAL column on the Trial
Balance.
Amount:
Key the figure from the Trial
Balance, and press <+> or <-> as it appears on the report. (Use
the plus and minus keys on the keypad, not the ones to the left of the <BACKSPACE> key.)
Click [OK]
after each entry.
After you have made an entry to
all of the accounts numbers below 4000, you will need to make a second entry to
the RETAINED EARNINGS PRIOR account.
The amount of the entry is the “net loss/gain” figure from the final
financial statement. Key the amount
with a plus or minus sign as it appears on your statement UNLESS the Tailoring
report shows that the natural sign has been deliberately reversed. If the sign was reversed when being printed,
then you will key the amount using the opposite sign.
Example – if the statement shows
an amount of ‘200.00’, and the tailoring does not reflect a reversal of the
sign, then you will enter the ‘200.00’ as it was printed - a positive amount.
If the statement shows
‘–200.00’, and the tailoring says that the sign is reversed, then you will
enter the amount as a positive ‘200.00’.
(FYI – You will not make an
entry into the CURRENT RETAINED EARNINGS account- this account exists as an
internal calculation file only)
When all entries have been
keyed, and your edit is in balance and without error, you will post the entry.
ENTER
BEGINNING BALANCES FOR NEW FISCAL YEAR PRIOR TO CLOSING THE OLD YEAR
Beginning balances are not automatically brought
forward when a fiscal year is closed.
Beginning balances are entered manually.
Many companies do not close a
fiscal year until they after they receive their final adjusting entries from
the CPA and the tax return is filed.
Since this could mean a delay of several months, the net effect would be
incomplete financial statements for the new fiscal year. (You would only have current year figures in
your asset/liability accounts if you ran financial statements for the current
year.)
If you wish to have "almost
accurate" financial statements for the current fiscal year prior to
closing the previous year, then you can enter a set of estimated beginning
balance figures, and later make an additional set of entries to adjust the
original posting.
To achieve this, you should
produce a Trial Balance for the last month and day of your prior fiscal year,
and a financial statement for the entire year.
YOU NEED TO RETAIN THESE REPORTS PERMANENTLY AND HAVE THEM ACCESSIBLE
FOR FINAL ENTRIES. Enter beginning
balances only for account numbers less than 4000. Use the figures in the YTD ACTUAL column from the Trial Balance,
and the net loss/gain figure from the financial statement. Use the beginning balance entry instructions
listed above in keying your beginning balance entries.
When you receive the final
figures from your accountant, make your final entries to the fiscal year,
produce the final Trial Balance and financial statements, and close the
year. Using the journal from the
posting of the estimated beginning balances, reverse the original
entries and post. Then, using the
figures from the final reports, key a new set of beginning balance
journal entries and post.
NEW
SKILMATCH CUSTOMERS - HOW TO ENTER BEGINNING BALANCES WHEN FISCAL YEAR HAS
ALREADY BEGUN
For new customers who are
starting on the SkilMatch system in the middle of a fiscal year, you have two
choices in getting beginning balances into SkilMatch.
(1) Enter a total YTD balance for each account, using a
transaction date of the last day of the final month before going on
SkilMatch. You will need a final Trial
Balance and financial statement from the other system. Your beginning balances are put in for EVERY
account (asset, liability, income and expense). You will enter a YTD figure for each of these accounts.
-OR-
(2) Enter a month-to-date balance for each account, for
each month prior to going on SkilMatch.
This method is necessary if you want to run financial statements on
SkilMatch that include the months previous to being on SkilMatch. You will need to have a Trial balance,
financial statements, and posting information that includes detail for every
asset, liability, income and expense account for each fiscal month of the year
that occurred before you started using SkilMatch. You will have to make a separate journal entry for each month,
posting one month before starting another.
Regardless of which method you
chose, you will use the same beginning balance data entry instructions as
listed above.