ADD (Check or Make a Change to the SkilMatch Check File)
This option allows you to manually add checks to the bank
reconciliation check file without
affecting the employee’s earnings or the general ledger. You
may also make changes to existing checks that are in the bank reconciliation
file.
The most common use of this option is to change the status on a
Direct Deposit check so that it can be voided.
Direct deposit checks are added to the check file with a status of D. The status must be changed to O before the system will allow the check to be voided.
THIS
MENU OPTION IS PASSWORD PROTECTED.
Be very careful about sharing the Bank
Reconciliation password with users!
To begin, in the main menu in the Pay and
Bill library.
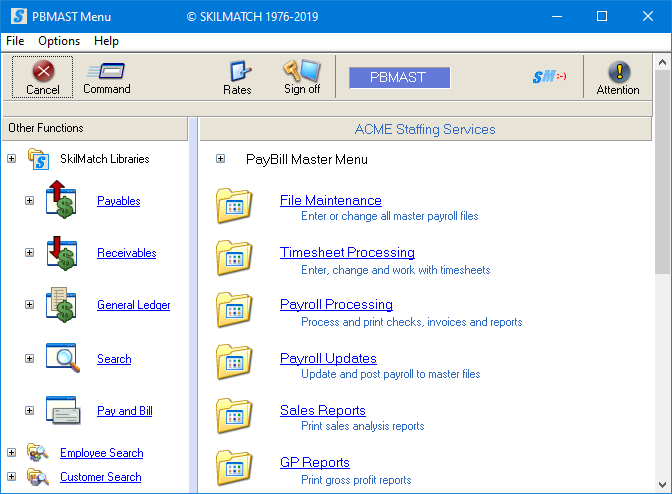
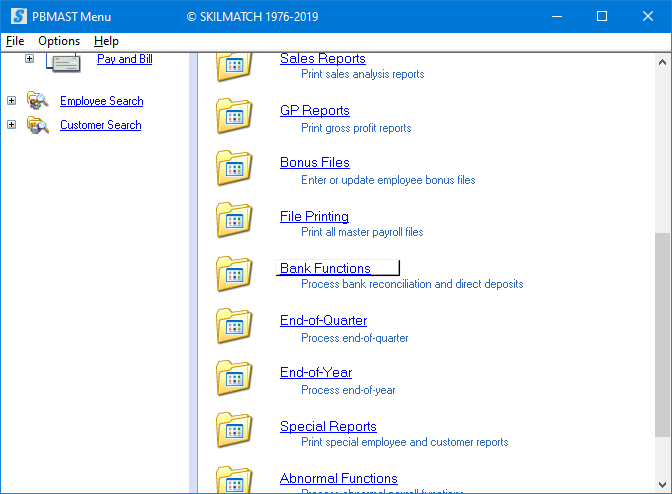
Next, scroll down or right click and select [Bank
Functions].
The screen will display:
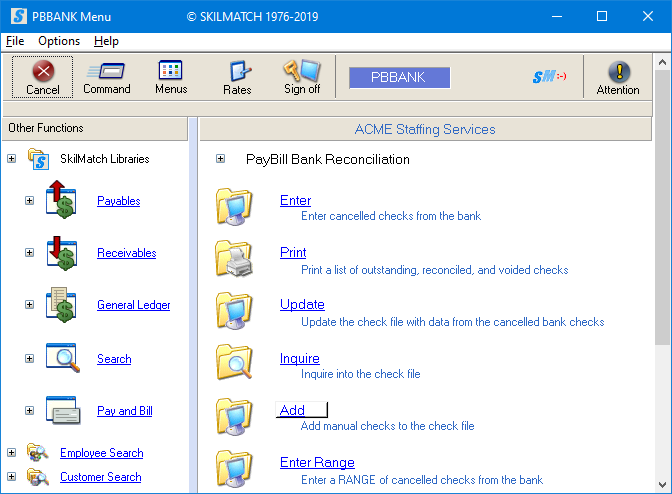
Click [Add], the screen will display:
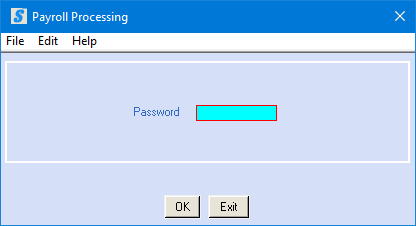
Password:
Key the bank reconciliation password. If you do not know the password, see your manager.
To continue, click [OK].
OR
To cancel and return to menu, click [Exit]. You will be returned to the “PayBill library, Bank Functions menu”.
If click [OK] to continue, the screen will display:
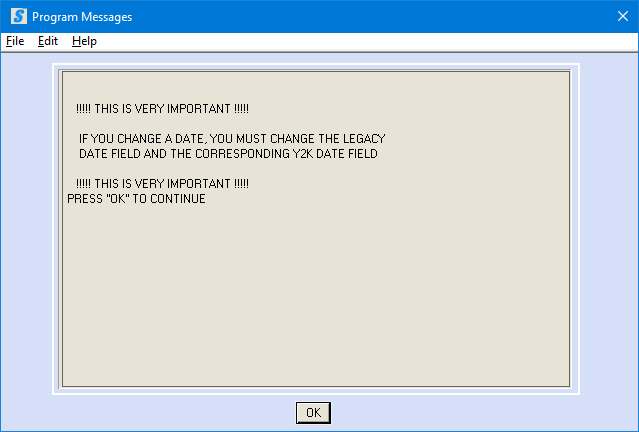
IMPORTANT NOTE:
If you change a date, you must change BOTH the
legacy date field (MMDDYY format) and the corresponding Y2K date field
(YYYYMMDD format).
Read the message and click [OK] to continue.
The screen will display:
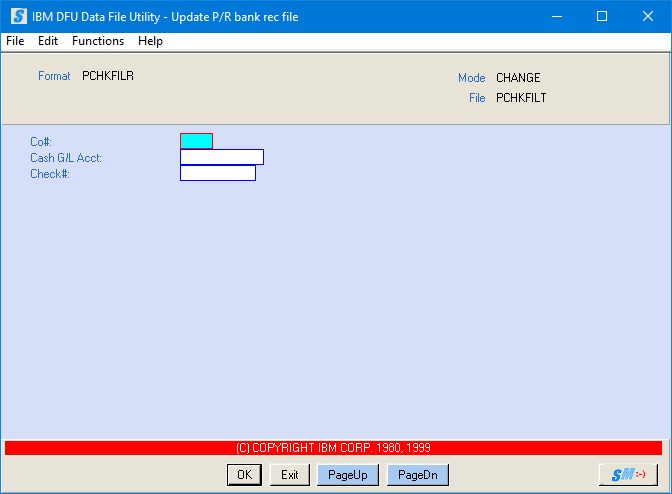
The screen will appear in CHANGE mode (refer to upper right corner of screen).
To make a CHANGE to an existing check, click change check to move forward to the instructions.
OR
To ADD a check, press <F10> to change to ENTRY mode.
If you press <F10> to ADD a check, the screen will display:
The screen will appear in ENTRY mode (refer to upper right corner of screen).
Co#:
Key the desired company number for the check you wish to add.
Cash G/L Acct:
Key the G/L cash account the check was written from. (Remember this will not update totals in the general ledger).
Check#:
Key the check number for the check you wish to add.
Chk Amount:
Key the net amount of the check. Do not key a decimal, but do key zeroes to hold decimal places, if necessary. Example: $50.00 would be keyed 5000; $50.55 would be keyed 5055.
Chk Date:
Key the date of the check in MMDDYY format. Example: January 17, 2020 would be keyed 011720.
Y2K Chk Date:
If you changed the Check date, you must also change the date of the check in YYYYMMDD format. Example: January 17, 2020 would be keyed 20200117.
Employee Name:
Key up to 25 characters of the employee’s name – using a last name (comma space) first name format.
Example: Doe, John
Empl Co#:
Key the G/L company number to which the employee file belongs.
Type:
Key P (for payroll).
NOTE: The Accounts Payable check file is separate from the Payroll check file, to add an AP check to the check file, refer to Menu APBANK/Bank Functions, Item Manual Checks.
Status (O,R,V,D):
If this check is outstanding (has not appeared on a bank statement), key 0 for outstanding.
OR
If this check has already appeared on a reconciled bank statement, key R for reconciled.
OR
If this check has been voided, key V for voided.
OR
If this check was a direct deposit, key D for deleted.
Soc Sec Num:
Key the employee's social security number without dashes or slashes.
Temp/Staff (T/S):
Key T for temporary.
OR
Key S for Staff.
Void Date:
If the Status of this check is V, then key the date of the void in MMDDYY format. Example: January 17, 2020 would be keyed 011720.
For all other Status codes, leave this area blank.
Y2K Void Date:
If you changed the Void date, then you must also change the YYYYMMDD format. Example: January 17, 2020 would be keyed 20200117.
For all other Status codes, leave this area blank.
Reconciled Date:
If the Status of this check is R, then key the date of the reconciled check in MMDDYY format. Example: January 17, 2020 would be keyed 011720.
For all other Status codes, leave this area blank.
Y2K Reconciled Date:
If you changed the Void date, then you must also change the YYYYMMDD format. Example: January 17, 2020 would be keyed 20200117.
For all other Status codes, leave this area blank.
To add this check to the check file, click [OK]. You will be presented a blank entry screen for the next check. If you have additional checks to enter, proceed using the instructions above.

Key additional check information.
OR
To cancel and return to menu, click [Exit]. You will be returned to the “PayBill library, Bank Functions menu”.
When you are finished adding checks to the check file, click [Exit].
If click [Exit] to finish entry, the screen will display:
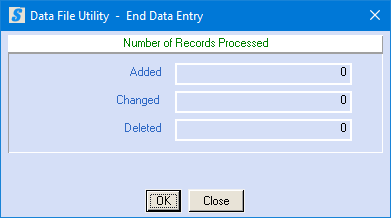
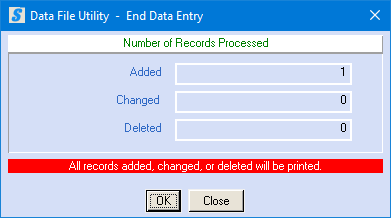
End Data Entry:
To return to menu, click [OK].
OR
To go back into the check file, click [Close]. You will be returned to the Data entry screen.
HOW TO CHANGE EXISTING CHECK DATA
IN THE CHECK FILE:
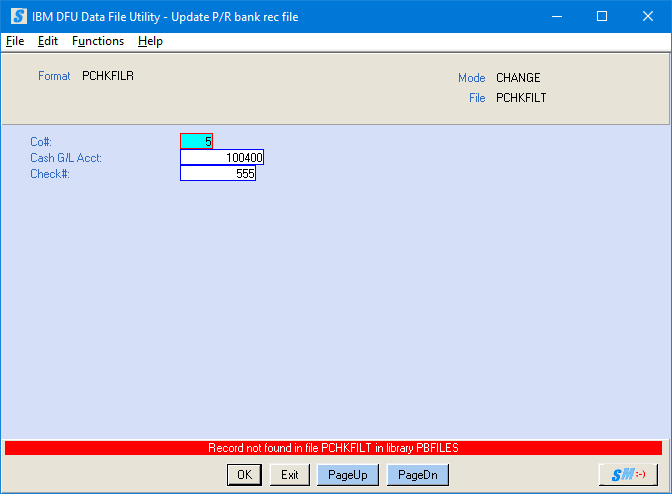
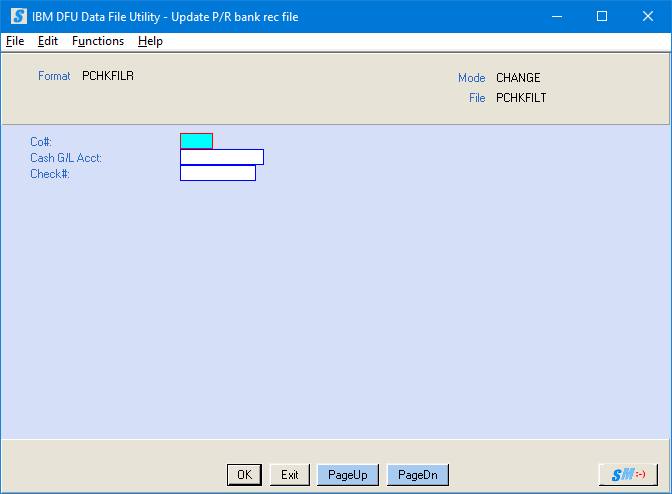
Co#:
Key the G/L company number for the check you wish to change.
Cash G/L Acct:
Key the G/L cash account from which the check was written.
Check#:
Key the check number of the check you wish to update.
Click [OK]. If no check is found, an error message will display.
* OR *
If the check is located, it will display:
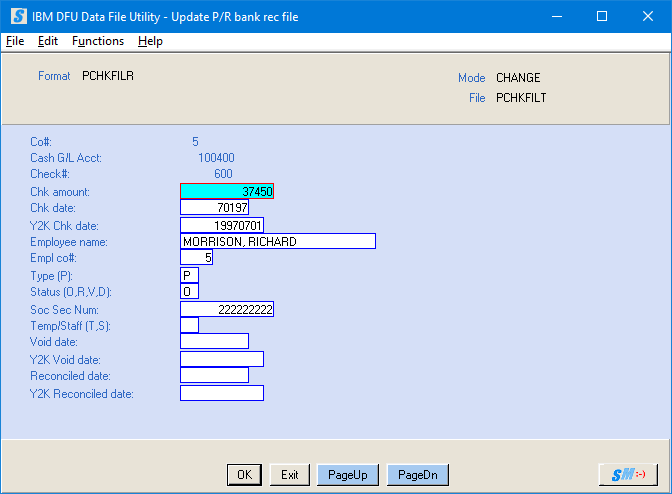
Use the <TAB> key to position the cursor in the area that needs correction. Be careful if making a change to any date – the format of the date is critical!
NOTE:
If you change a date, you must change BOTH the
legacy date field (MMDDYY format) and the corresponding Y2K date field
(YYYYMMDD format).
When the changes are made, click [OK]. This check will disappear, and the screen will be ready for another check.
When you have finished making changes, click [Exit].
The screen will display:
End Data Display:
To return to menu, click [OK].
OR
To go back into the check file, click [Close]. You will be returned to the Data entry screen.