INTRODUCTION TO ENTERING VOIDS/REISSUES
This option allows you to:
void
a check (both standard checks and direct deposit "checks")
reissue
a check
reissue
a check with an advance deducted from it
reissue
a check with a different hold code
issue
a credit memo.
Use this option to create
void/reissue batches and enter and edit voids/reissues. Each void/reissue batch will contain
system-created timesheets - one for each void, and one for each reissue.
The
following is a list of the different features described in this documentation:
Adding
to an existing batch of voids
Preliminary steps To Voiding a Direct Deposit Check or a Zero Net
Check:
If you are voiding a
direct deposit check or a check that was originally issued with a net of zero,
you must do the following before attempting to use this option:
(a) From
the “PayBill Library Master” menu, click [Bank
Functions]. From the “PayBill
Library Bank Reconciliation” menu, click [Add]. Refer to document Menu
PBBANK, Item Add for further information on this option.
(b) When
you get into this option, you should be in CHANGE mode (look in the top right
corner of the screen). Bring up the check number you need to void.
If the check number is not there
because it has already been reconciled, press (F10) to go to ENTRY mode, and
add it to the bank rec file.
(c) If the
check record comes up on your screen, change the status from D (delete)
to O (open). Press (Enter).
Continue with the instructions
below.
HOW TO ENTER
VOIDS/REISSUES
You may have an unlimited number
of void/reissue batches in process at any one time.
To
begin, on the “PayBill Library Master” menu, click [Timesheet
Processing].
The screen will display:
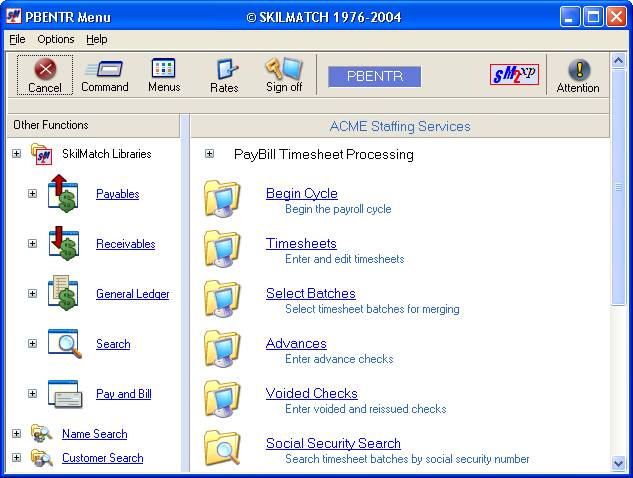
Click [Voided Checks].
The screen will display:
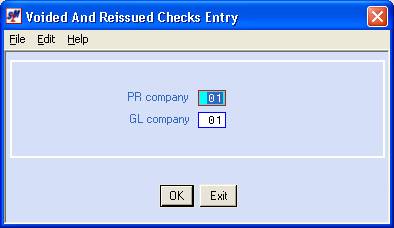
P/R
Company Number:
Defaults to company 01. If you wish to enter voids and reissues for
a different payroll company, key the desired company number.
G/L
Company Number:
Defaults to company 01. If you wish to enter voids and reissues for
a different general ledger company, key the desired company number.
To NOT proceed, click [Exit]. You will be returned to the “PayBill Library Timesheet Processing”
menu.
To continue, click [OK].
The screen will display:
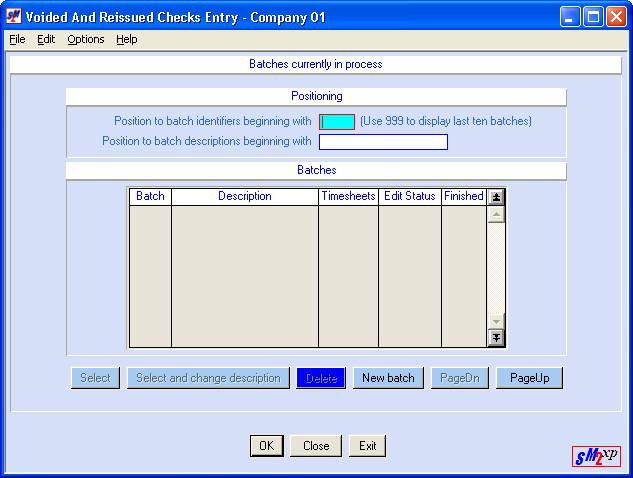
(Click “Options” or <RIGHT CLICK> on the screen to see options
and shortcut keys)
Note: users with an
assigned timesheet batch will NOT see this screen.
The screen will display any existing batches. You may add additional timesheets to an existing batch, delete an existing batch, create a new batch, or change the description of an existing batch.
If the batch you want to work
with is not displayed on this screen, you may use one of the “Positioning”
areas to move forward.
Position to batch identifiers beginning with:
Since there may be more batches
than can display on a screen, use this area to move forward to a desired batch,
rather than paging forward numerous times.
Key up to three characters of the batch ID to which you wish to
position. Click [OK] or
press <enter>.
OR
To display the final 10 batches,
key 999 in this field and click [OK] or press
<enter>.
OR
You may page up/page
down to display batches.
Position To Description Beginning With:
Key up to 15 characters of the
batch description to which you wish to position. Click [OK] or press
<enter>.
To position again, <TAB>
to this field and key the desired batch description.
BATCHES
To
select one of the batches displayed, use your mouse to <DOUBLE-CLICK>
on the batch.
OR
Click
once on the batch to highlight it and then click [Select].
Change the description of an existing batch:
Note: users with an assigned
timesheet batch will NOT be allowed to perform this function.
Click
once on the batch to highlight it and then click [Select
and change description].
The
screen will display:
Key the desired
description and click [OK] or press <enter> to continue changing
the description of the batch.
To not
change the description of the batch, click [Close].
DELETE AN EXISTING BATCH
Note: users with an
assigned timesheet batch will NOT be allowed to perform this function.
To
delete one of the batches displayed, click once on the batch to highlight it
and then click [Delete].
The
screen will display:
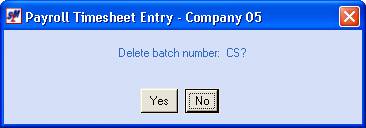
To NOT continue deleting this
batch, click [No]. You will be returned to the list of
timesheet batches.
To continue deleting the batch,
click [Yes].
The screen will display:
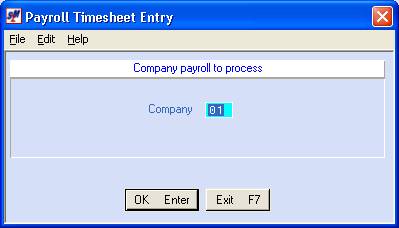
To continue working with voids,
key the desired company and click [OK] or press
<enter>.
To NOT continue working with
timesheets, click [Exit] or press <F7>.
CREATING A NEW BATCH
Note: users with an
assigned timesheet batch will NOT be allowed to perform this function.
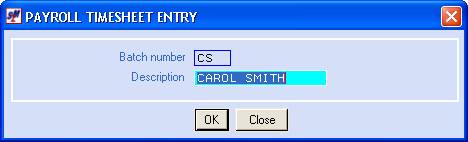
To create a new batch, click [New batch].
The screen will display:

Batch
Number:
Assign a two or three character
combination (letters or numbers) to identify the batch (you cannot use an ID
that is already assigned a timesheet batch, void batch, assigned batch, or
reserved batch).
Press
the <TAB>
key for additional keying.
Description:
Key up to 15 characters
describing the batch (name, initials, office, kind of timesheets to be
included, etc.).
To NOT continue creating the new
batch, click [Close].
To continue creating the new
batch, click [OK]
or press <enter>.
The screen will display:
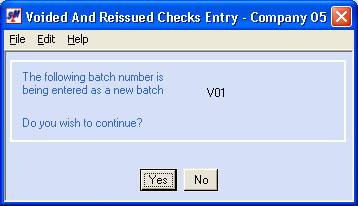
To NOT continue creating the new
batch, click [No]. You will be returned to the list of
timesheet batches.
To continue creating the new
batch, click [Yes].
The screen will display:
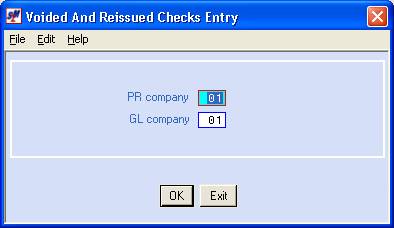
To return to the list of
timesheet batches, key the desired P/R company number and G/L company number
and click [OK].
To return to the “PayBill
Library Timesheet Processing” menu, click [Exit].
The screen will display:
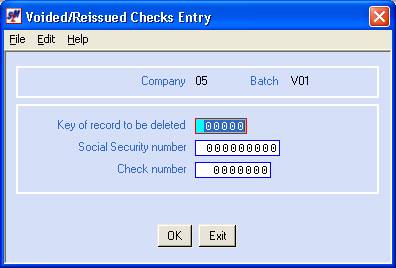
Key Of
Record To Be Updated
If you are adding a check to be
voided, leave this area blank.
To delete a void/reissue already
entered, obtain the KEY number from the edit, move the cursor to this area, and
key the KEY number.
If you are adding a check to be
voided, key the social security number of the employee whose check is to be
voided.
Check Number:
Key the check number to be
voided.
To NOT proceed, click [Exit].
Refer to edit in this document for further
instructions.
To continue, click [OK].
The screen will display:
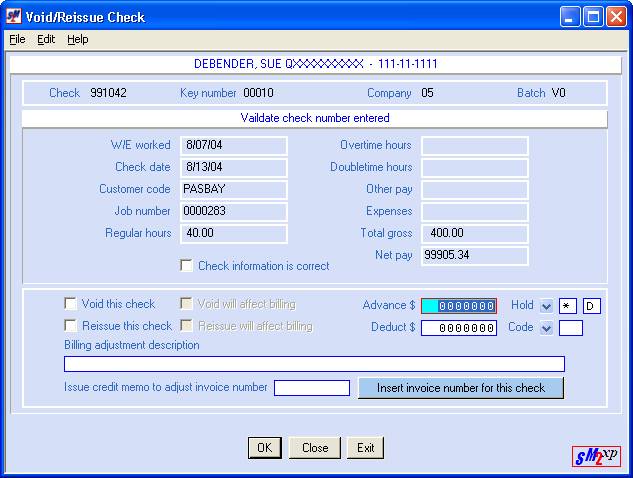
The check detail from the check
number entered on the previous screen is displayed.
Verify that this is the correct
check.
Check information is correct:
If the check information is
correct, select by clicking once to display the checkmark.
If the check information is NOT
correct, click [Close]. You will be returned to the previous screen
where you may try again.
Void this check:
If this check is to be voided,
select by clicking once to display the checkmark.
If this check is NOT to be
voided, leave this area blank.
Note: the check will be voided EXACTLY as issued,
even if job order information, withholding information, or deduction
information has changed since the check was issued. The record in the internal PAYBILL file is voided.
Void Will Affect Billing:
This area remains “grayed out”
until the VOID CHECK box is checked.
If this void should affect the
customer's billing, select by clicking once to display the checkmark.
If this void should NOT affect
the customer’s billing, leave this area blank.
Note: the billing will be voided EXACTLY as issued, even if job order
information has been changed since the billing was issued. The record in the PAYBILL file is voided.
Advance $:
If you wrote the employee an
advance check to replace the lost or incorrect original check, and want the
amount of the advance to be subtracted from the reissued check, key the amount
of the advance. Hold two decimal
spaces. Key $25.00 as 2500.
Hold:
The system will display the
paycheck hold code that was used on the original check. If you want the reissued check to have a
different hold code, then key in a valid code, or click the ![]() button or (F4) to select from a list of valid codes.
button or (F4) to select from a list of valid codes.
If the reissued check is to be a
direct deposit, then the hold code must be *D.
Reissue this check:
If you wish to reissue a check
that is EXACTLY like the check being voided, select by clicking
once to display the checkmark. Normally
a check is reissued if it was correct to begin with, but was lost or destroyed
and needs to be replaced. The only
change that will occur on the new check would be changes made to the employee’s
name since the original check was issued.
If you do NOT wish to reissue
this check, leave this area blank. You
should NOT reissue if there was anything wrong with the original check (wrong
amount, wrong taxes withheld, wrong customer, etc.) Instead, you should VOID the check, and manually re-key a
timecard that will issue an accurate check.
Reissue Will Affect Billing:
This area remains “grayed out”
until the REISSUE THIS CHECK box is checked.
If the reissue should be billed
to the customer, select by clicking once to display the checkmark.
If this reissue should NOT be
billed to the customer, leave this area blank.
Note: the billing will be voided EXACTLY as issued, even if job order
information has been changed since the billing was issued. The record in the PAYBILL file is voided.
Deduct $:
If
you would like to deduct dollars from a reissued check, key the amount (up to
$99,999.99). Typically this would be
for a stop payment fee or some kind of fee for the void and reissue. The system will NOT allow you to deduct
pre-tax dollars from a reissued check.
Code:
If you keyed an amount into the
DEDUCT $ area, then you must also key a valid deduction code (other than
pre-tax), or click the ![]() button or (F4) to select from a list of valid codes.
button or (F4) to select from a list of valid codes.
Billing Adjustment Description:
If you selected to affect
billing, you MUST enter an adjustment description to print on the invoice. This will give the customer additional
information concerning the credit. Key
up to 60 characters, and enclose the description in parenthesis. Example:
(Incorrect bill rate)
Issue Credit Memo To Adjust
Invoice Number:
If you selected to affect
billing and if wish to credit the original invoice for the amount billed, key
the original invoice number. If you do
not know the original invoice number, the system will insert it for you by
clicking [Insert
invoice number for this check] or pressing (F3).
To continue, click [OK]. You will go to the social security
number/check number screen for the next void entry.
To NOT proceed but to try again,
click [Close]. You will be returned to the social security
number/check number screen to try again.
After your last void entry or to
NOT proceed and be returned to the “PayBill Library Timesheet Processing” menu,
click [Exit].
Repeat the preceding steps to enter
additional void and reissues.
Voiding
Direct Deposit Checks:
If the check was NOT a direct
deposit, please advance to edit.
If the check being
voided/reissued is a direct deposit check and if you clicked [OK] to continue, the screen will display:
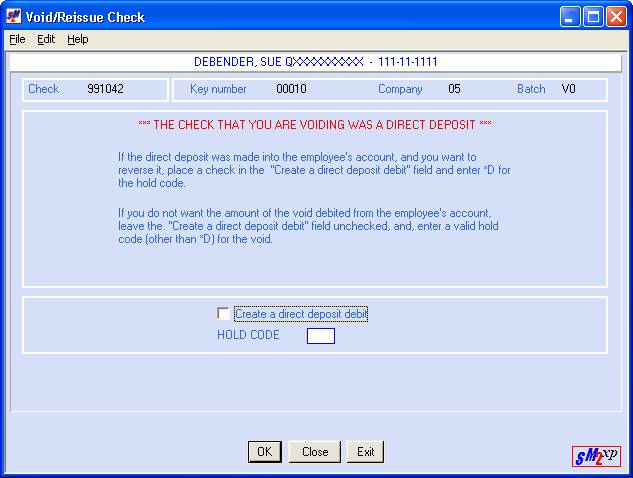
If you want the amount of
this voided check to be sent to the bank so that the amount previously credited
to the employee’s bank account will deducted, select Create a direct
deposit debit (the checkmark will be
displayed) and enter *D as the hold
code.
If you do NOT want the
amount of this voided check to be deducted from the employee's bank account,
leave the ‘Create a direct deposit debit’ area blank and enter any valid hold
code other than *D.
To continue, click [OK].
To NOT proceed but to try again,
click [Close]. You will be returned to the social security
number/check number screen to try again.
After your last void entry or to
NOT proceed and be returned to the “PayBill Library Timesheet Processing” menu,
click [Exit].
Repeat the preceding steps to
enter additional void and reissues.
Edit
Report
When you have finished with
entry, click [Exit].
The screen will display:
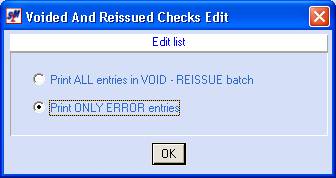
To print every entry in the
batch, select “Print ALL entries in VOID/REISSUE batch” (a black dot appears
beside your selection). This is the
recommended option - if you enter a check number more than once, it will
void/reissue more than once.
To print only voided check
entries with errors, plus any new voids added during this session, leave the screen
as it is (a black dot appears beside your selection).
Click [OK].
If the batch passes edit, the
screen will display:
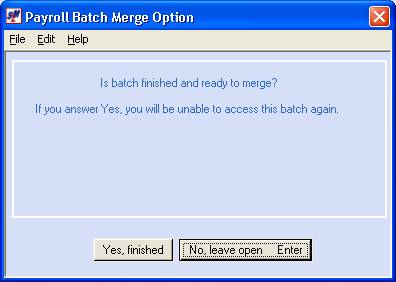
Is Batch Finished And
Ready To Merge?
If you are finished making
entries in this batch and the batch is ready for merging, click [Yes].
Note: if you answer YES, you will be unable to
access this batch again; you will be unable to add entries to this batch.
If you are NOT finished making
entries in this batch and the batch is NOT ready for merging, click [No].
Note: the batch does
not need to be marked Finished “Y” to be merged.
You will return to the “PayBill
Timesheet Processing” menu. You will
receive a two-part printed report.
Note: please review all edits carefully. If you enter a check number more than once,
it will void/reissue more than once.
The first section of the edit
displays the void and reissue “timecard” detail. Any error found will print directly beneath the timesheet,
preceded with 4 asterisks (****).
The second section prints the
batch totals for this batch, and (hopefully) the message “HAS PASSED EDIT AND
CAN BE MERGED”.
HOW TO CORRECT
ERRORS IDENTIFIED ON THE EDIT
The system will create a record
for each void and for each reissue. If
the system identifies errors on Void/Reissue batch edit, you cannot make
corrections to the records. Instead,
you must DELETE the void and/or the reissue record and re-key it correctly.
A KEY number is assigned
record of each check you void, and to each reissue. The VOID record will come
before the REISSUE timecard.
If you have also elected
to issue a credit memo, the credit memo detail will be a part of the VOID
timecard. If you elected to have the
REISSUE affect billing, then the billing detail will be a part of the REISSUED timecard.
To delete void/reissue
records from the batch, go back into the Voided Checks option until the
following screen appears:

Key Of
Record To Be Updated
To delete a void/reissue already
entered, obtain the KEY number from the edit, move the cursor to this area, and
enter the KEY number.
If you voided AND reissued a
check, there will be two key numbers in the void/reissue batch for these
transactions. You may delete only one
of the records or both. Make sure you
delete both records if that is your intention.
To NOT proceed, click [Exit].
Refer to edit in this document for further
instructions.
To continue, click [OK].
The screen will display:
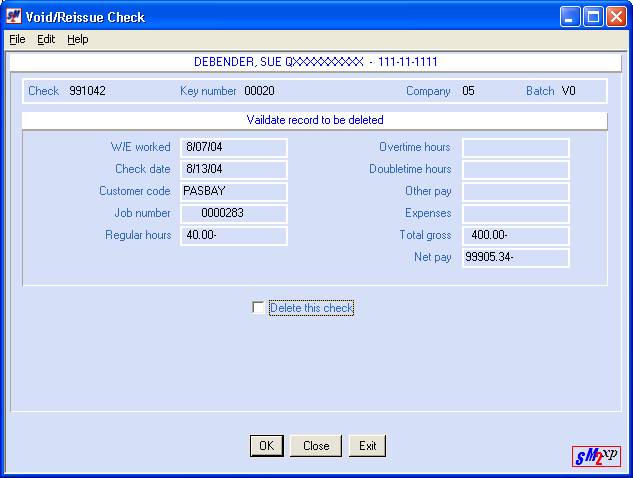
Delete
This Check:
To delete this record from the
void/reissue batch, click once on this option to select (a checkmark will
appear next to your selection).
Note: once the record is marked delete, you cannot undelete it. If you delete a void from the batch in
error, you must re-enter the void to include it in the batch again.
Depending on your responses
during the entry process, the system will have created a Void only, or a Void
and a Reissue, or a Reissue only.
Creating a “Reissue only” is not
common, and is used primarily because a check was voided from the system twice
by accident, and the earnings need to be increased.
To NOT proceed, click [Exit].
Refer to edit in this document for further
instructions.
To return to the previous screen
without deleting this record, click [Close].
To continue, click [OK].
The system will return to the
KEY NUMBER screen. If you have
additional items to delete, key in the next key number.
When you have finished, click [Exit].
Refer to edit in this document for further
instructions.