LIST CHECKS, Accounts Payable
Prints a list of:
·
Checks
entered through options Enter
Checks and Cancelled
Checks
·
Any
checks considered still outstanding as of a certain date
·
Voided
checks not cleared from the system
This report is your written verification of check entries made through Menu Bank
Functions, Item Enter Checks and Menu Bank
Functions, Item Cancelled Checks.
Scrutinize
this report carefully for accuracy prior to updating the check file through
Menu Bank
Functions, Item Update Check File.
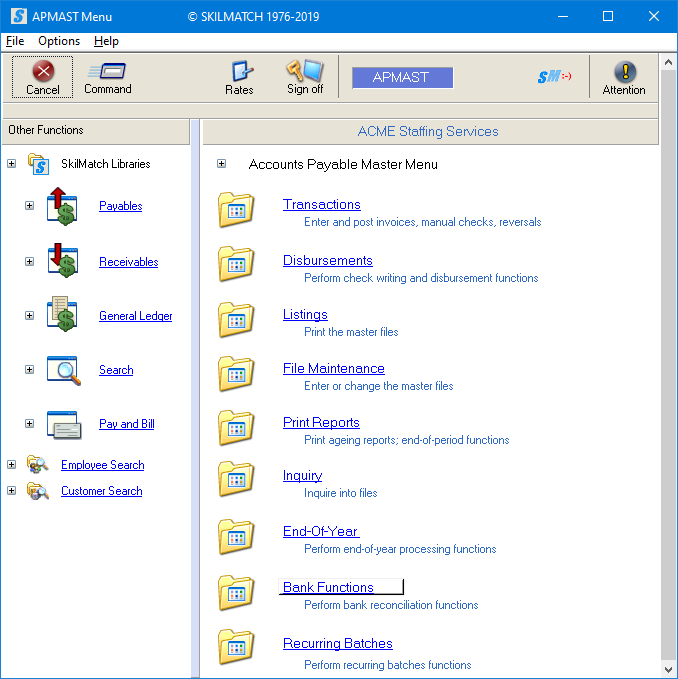
To begin, select the [Bank Functions] menu in the Accounts Payable library.
The screen will display:
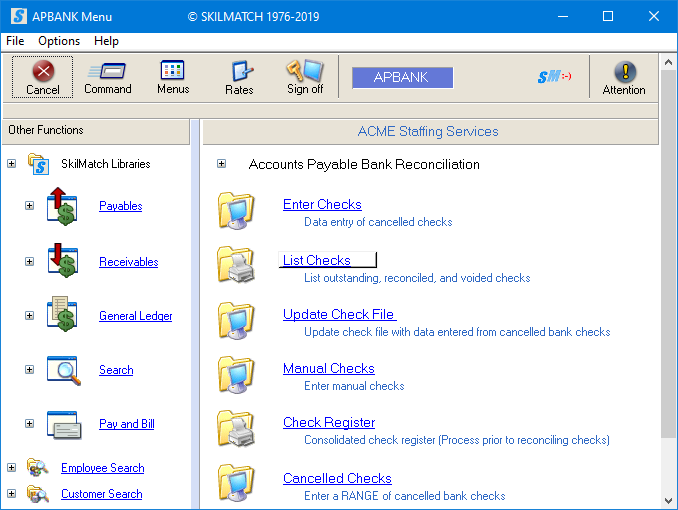
Click [List Checks], the screen will display:
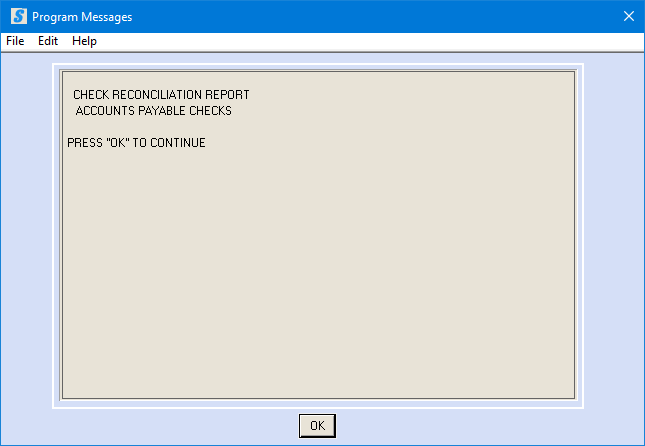
Click [OK],
the screen will display:
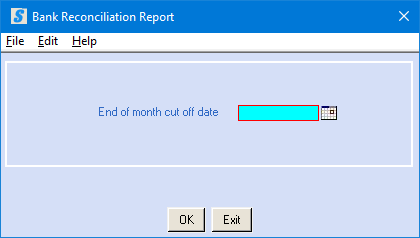
End Of Month
Cut Off Date:
The end of month cut off date (date of the
bank statement to which you are balancing) may be keyed (without punctuation) as
a six-digit (MMDDYY) date of the last day of the period/year you selected.
OR
Select date by
clicking the ![]() button (prompt and select) to the right of
dates and a calendar will display from which you may click on a date to select,
and then click [OK] to bring the calendar date
into the date field.
button (prompt and select) to the right of
dates and a calendar will display from which you may click on a date to select,
and then click [OK] to bring the calendar date
into the date field.
To proceed, click [OK]. Your screen will remain “input inhibited”
(tied up) while the option processes.
When processing has completed, you will be returned to the “Accounts
Payable Bank Reconciliation” menu.
OR
To cancel and return to menu, click [Exit].
If you click [Exit] to
cancel, the screen will display:
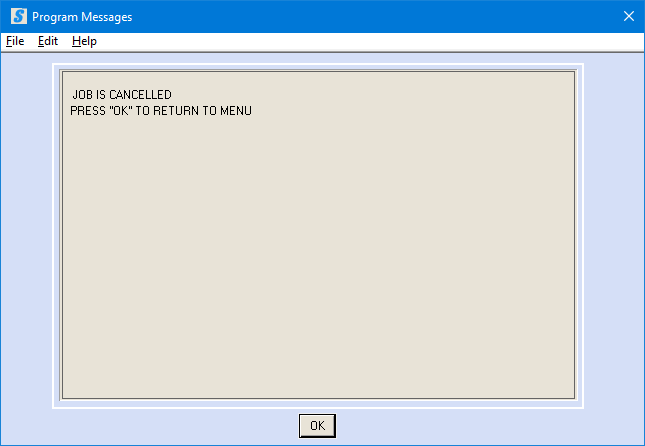
Click [OK]
to continue. You will be returned to the
“Accounts Payable Bank Reconciliation” menu.
Report Produced:
Review Bank Reconciliation report
(AP610P) and make changes as needed, see “Errors on
Report” below.
The Bank Reconciliation report (AP610P) will display vendor
code, vendor name, check date, check number, check amount, and a void date,
where applicable.
The check amount will appear under one of three column headings--Outstanding,
Reconciled, or Void.
Any check in the system that was not cleared in a previous reconciliation
or was not entered in Menu Bank
Functions, Item Enter Checks will appear under the
outstanding column.
Any check that was entered in Menu Bank
Functions, Item Enter Checks to be cleared will
appear under the reconciled column.
Any check entered with a void code will appear under the voided column.
Any check entered with a deleted code will moved back to the outstanding
column.
NOTE: If
the check amount entered in Menu Bank
Functions, Item Enter Checks differs from the amount
issued by the system, both amounts will appear on the report. The SkilMatch issued amount will appear under
outstanding, and the bank issued amount entered through Menu Bank
Functions, Item Enter Checks (the bank code amount) will appear under reconciled. A message will appear to the side that
reads: *AMTS NOT EQUAL*. You must make
adjustments to the general ledger that will account for this difference.
The bank reconciliation
report is broken into sections according to bank account number, and the last
line of each section displays separate bank account totals for outstanding
checks, reconciled checks and voided checks.
NOTE: If you have check amounts that differ between
what the bank charges and what the system issued, the outstanding column total
will not include that check amount even though it is displayed as a dollar
figure within that column.
Errors on
Report:
If you find errors on the Bank Reconciliation report (AP610P),
go back to Menu Bank
Functions, Item Enter Checks. Follow the procedures as if you were entering
a new check number. The system will
display what you entered previously. Key
over/replace information shown with the correct information, examples below.
CHECK
SELECTED IN ERROR: To remove this check from the reconciled
list, change the code to Deleted.
WRONG
DOLLAR AMOUNT ENTERED: If you have entered a wrong amount or code, <tab>
to the field and key over the existing information with the correct information.
When the information for the check is correct, click [OK]. When you have made all corrections, click [Exit]
to end the job.
REPEAT: You
should print another Bank Reconciliation report Menu
Bank Functions, Item List Checks to inspect the
changes made.