INTRODUCTION
TO SETTING UP THE GENERAL LEDGER
The following steps should be
taken to set up the general ledger in SkilMatch.
1. Design (but do not enter)
general ledger account numbers (refer to document Menu
GLMANT, Item Accounts.
2. Design (but do not
enter) your financial statement tailoring (refer to document Menu
GLMANT, Item Tailoring).
3. Enter company names (refer to
document Menu
GLMANT, Item Company).
4.
Create and enter names for the cost centers (refer to Menu
GLMANT, Item Cost Center Descriptions).
5. Enter general ledger account
numbers for the balance sheet accounts and one cost center (refer to document Menu
GLMANT, Item Accounts).
6. Use the system to create the
additional cost center account numbers (Menu
GLMANT, Item Copy Chart of Accounts).
7. Add and delete account
numbers to the completed Chart of Accounts (Menu
GLMANT, Item Accounts).
8. Enter financial
statement tailoring (refer to document Menu
GLMANT, Item Tailoring).
9. Set retained earnings numbers
for current and prior year earnings (refer to Menu
GLMANT, Item Retained Earnings).
10. Set group number for
percentage calculations (refer to Menu
GLMANT, Item Set Group).
11. (Optional) Establish
consolidations (company and/or cost center) (refer to Menu
GLMANT, Item Consolidations or Menu
GLMANT, Item Division Consolidation).
12. Enter budget and/or prior
year data (refer to Menu
GLMANT, Item Budgets and Prior and Menu
GLMANT, Item Duplicate Budget).
13. Activate budget and/or prior
year data (refer to Menu
GLMANT, Item Activations).
14. (Optional) Enter beginning
balances (refer to documentation concerning ‘Beginning Balances in General
Ledger’ in document Menu
GLJOUR, Item Data Entry).
15. (Optional) Maintain valid
posting periods for all SkilMatch accounting applications. (refer to Menu
GLMANT, Item GL Posting Periods)
HOW TO MAINTAIN TAILORING FILE RECORDS
Use this option to add or change
financial statement format (tailoring) information.
“Tailoring” refers to the design
of your balance sheet and income statement.
There are 3 basic elements to a financial statement. HEADINGS: the words that describe what is to
be printed (like Current Assets); SUMMARY: words that describe the dollars to
be printed (like Cash in bank); and TOTALS: the adding of figures to make
totals.
You should begin this process
with a sample of a summarized balance sheet and income statement for a single
cost center, and one for G&A. On
the samples, assign a number to each printed line in sequential order.
For the balance sheet,
start with 0050 and continue through 3999.
Skip numbers as you go along, to leave room for additional lines in the
future.
Example:
Assets 0050
Current assets 0100
Cash in bank 0150
Accts Recv 0200
Prepaid Expense 0250
Total Current 0400
For the income statement,
start with 4100 and continue through 9999.
Skip numbers as you go along, to leave room for additional lines in the
future. Example:
Income 4100
Temporary sales 4150
Direct hire fees 4200
Billed expenses 4250
Total sales 4500
Financial statements do NOT
print in order by general ledger account number, but by group number. A “”group” is a series of one or more like
accounts (Like Payroll cash account, Operating cash account, Savings account;
or federal withholding payable, FICA payable, and Medicare payable).
You have a choice when printing
financial statements of printing a Summarized version that follows the
tailoring (Cash in bank – with a grand total of all cash accounts in the group)
or a Detailed version (prints a separate line for each account in the
group – Payroll account, Operating account, etc.)
You will also have the
opportunity to assign indentions to each line, and to control the insertion of
blank lines wherever you like.
After you have completed the
design on paper, you will need to back to the Chart of Accounts option and add
the group numbers to every account in your chart of accounts through Menu
GLMANT, Item Accounts.
To
begin, on the “General Ledger Master” menu, click [Maintenance].
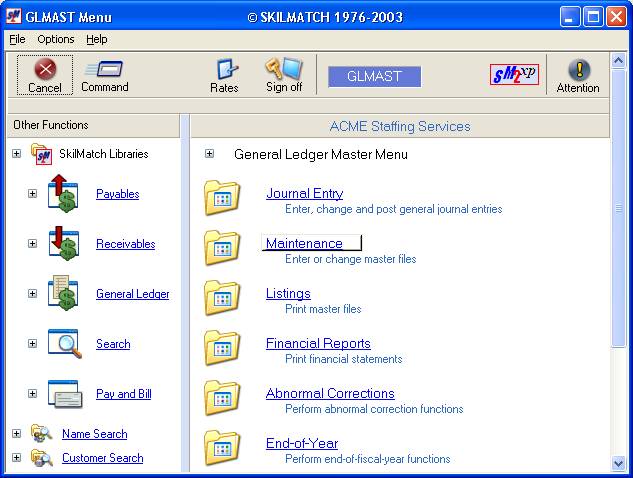
The screen will display:
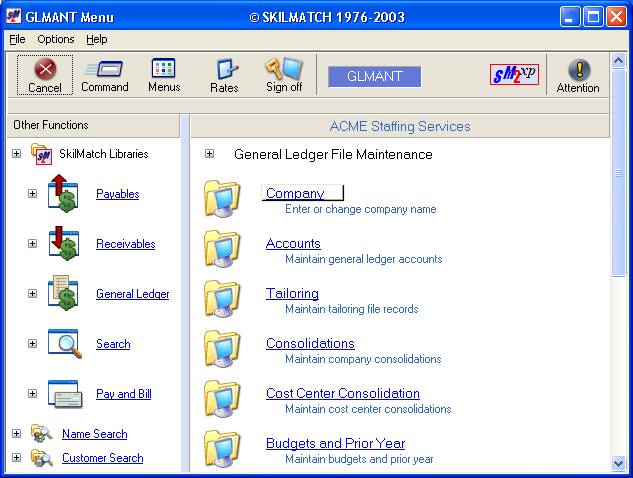
Click [Tailoring].
The screen will display:

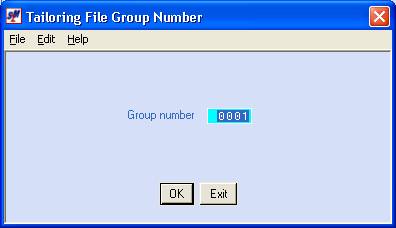
Group Number:
A “group number” simply refers to a number assigned to a line that is to print on your financial statements. By numbering lines in numerical order, you are instructing the program the order in which to print the lines of your statement.
You will NOT have a
separate group number for each account number. Many accounts will belong to the same group,
other groups will only have a single account.
Remember that Balance Sheet accounts belong to group numbers 0001-3999. Income and expense accounts belong to groups
4100-9999. (Do NOT use group numbers 4000-4099).
Key an existing group number
that you wish to change.
OR
Key a new group number that you
wish to establish.
To proceed, click [OK].
The screen will display:
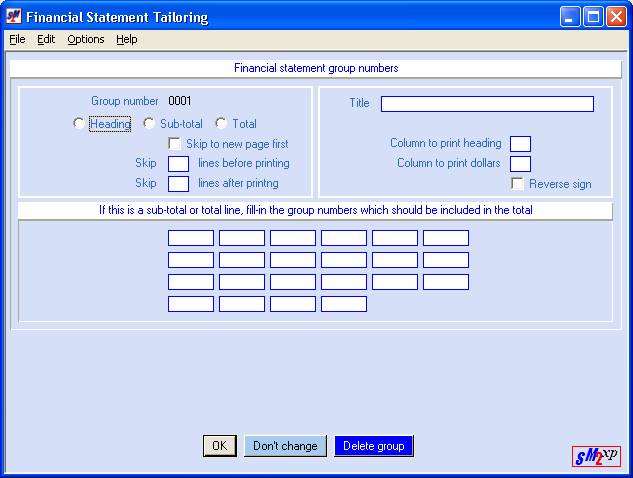
HEADING/SUB-TOTAL/TOTAL:
Choose one of these 3 choices to
establish what kind of element this group number will represent.
HEADING is
strictly a title - there are no dollars associated with it (like CURRENT
ASSETS).
SUB-TOTAL means
there will be one or more account numbers with dollars belonging to this group
(like CASH IN BANK).
TOTAL will
combine up from 1 to 22 SUBTOTAL groups together as a single figure (like TOTAL
CURRENT ASSETS).
Select
one of these 3 choices, and press the <TAB>
key for additional keying.
Skip to New Page First:
If you wish to begin a new page
when this group number prints, click this selection. A black dot will appear.
If you do NOT wish to begin a
new page, leave this area blank.
Skip Lines Before Printing:
Key the number of blank lines to
be inserted before printing this line.
Select 0, 1, 2, or 3.
Note: if you enter 0, then you must enter 1,2, or 3 in the area Lines
After.
Note: if you enter 1 in both Lines Before and
Lines After, the system will double-space before and after the line is printed.
Skip Lines After Printing:
Key the number of blank lines to
be inserted after this line is printed.
Select 0, 1, 2, or 3.
Note: if you entered 0 in the Lines Before area, you must key 1, 2, or 3.
Title:
Key a title or description for
this group. There are 25 characters
available. If you do not wish to have a
title, key a ‘.’ (period).
Column To Print Heading:
You have a choice of three
indentions for the TITLE.
1
prints the title against the left margin.
2
indents three spaces before printing the title.
3
indents six spaces before printing the title.
Column To Print Dollars:
You have a choice of three
indentions for the DOLLARS.
1
indents to the middle of the page before printing the dollars.
2 indents to the right of position 1.
3
indents to the right of position 2.
Reverse Sign:
If this group number prints
dollars, selecting this area will causes the amount's sign to be reversed.
Example: credit balances are negative numbers and
debit amounts are positive numbers.
Therefore, credit balances will appear with a negative sign (-), and
debit amounts will print without a (-) unless you select this area.
Note: generally, liability accounts have reversed signs.
If This Is A Total Line. Fill In The Group Numbers Which Should Be
Included In The Total:
If this is a Total line, key the
group numbers whose sums are to be added together. You may enter up to 22 group numbers, and they must be keyed in
numerical order. We suggest that if you
have more than 22 group numbers that need to be added together for a grand
total, that you find a way to divide them into smaller groups that have a
Heading, then add together these smaller groups into a total line.
For example – don’t have an
all-inclusive Heading that reads EXPENSES and lists all expenses
alphabetically. Instead, break them
into smaller groups like Recruiting Expenses (advertising, marketing, customer
and employee gifts), Operating Expenses (like rent, utilities, telephone)
etc. Then you can form a Total Line
group that will add these individual groups.
Do NOT leave any blank spaces! Your total line will not calculate correctly
if there are
Include only group numbers that
are lower than the group number displayed at the top of the screen.
If
you are satisfied with the setup displayed, click [OK].
Note: if you have neglected to fill in all the necessary
fields, the screen will display the error, and you may move the cursor to the
appropriate field to make the entry.
If at any time you wish
to discontinue this entry and erase everything you keyed on this particular
group number, click [Don’t change]. The system
will return to menu without updating the files.
If at any time you wish
to delete this entry and erase everything you keyed on this particular group
number, click [Delete
this group]. The system will delete
this group number and return to menu.
Note: If the group
you are deleting has been assigned to account numbers, you will need to go to
the account and change to a valid group number.
Repeat the preceding
steps until all statements are tailored to your satisfaction. Click [Exit]
to end the job and return to menu.
The screen will display:
Click [OK]. You will receive an edit report. Verify the accuracy of the entries. If everything appears correct, you are
finished with this option. If you see
errors, you must re-enter the option to make corrections.